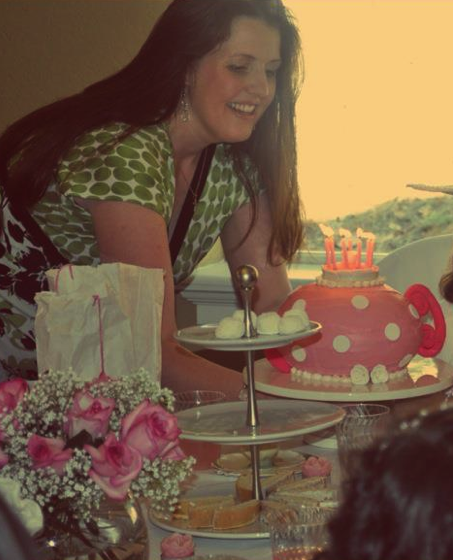
The Tea Pot Cake was such a hit at my daughter’s Tea Themed Birthday Party yesterday! Since a few of you asked if I could share how I made the cake I will try and put together a little tutorial. I hope this helps! Please let me know if you have any other questions.
Before starting on our cake, I searched
google images for inspiration and was most inspired by
this beautiful tea pot cake on Cake Central, though you’ll notice that mine turned out quite differently…
Supplies:
2 Boxes of Cake Mix – I used White Cake Mix, without the pudding in the mix
2 cans of Strawberry Frosting
White Frosting – I used the same recipe from the Castle Cake
1 package of Neon Pink Fondant
3 wooden skewers and 4 toothpicks
1 package of Necco Wafer Candies
3 White Icing Roses – since I happened to have three in the cupboard
Soccer Ball Cake Pan
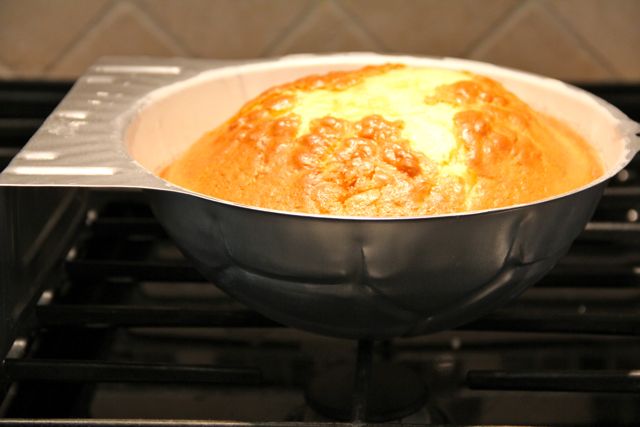
Using the Soccer Ball Cake Pan, I baked the two halves of the cake. (I actually made the cakes on Saturday, and stuck them in the freezer until Monday when I decorated them. I usually put the cakes in the freezer for 20 minutes or so before frosting, but frosting this cake completely frozen was the easiest ever. In fact, I don’t think I spent more than 20-30 minutes decorating, from start to finish.) Each half of the cake is made from one boxed mix. I followed the directions on the cake pan, and it took about 45 minutes to bake each half of the cake.
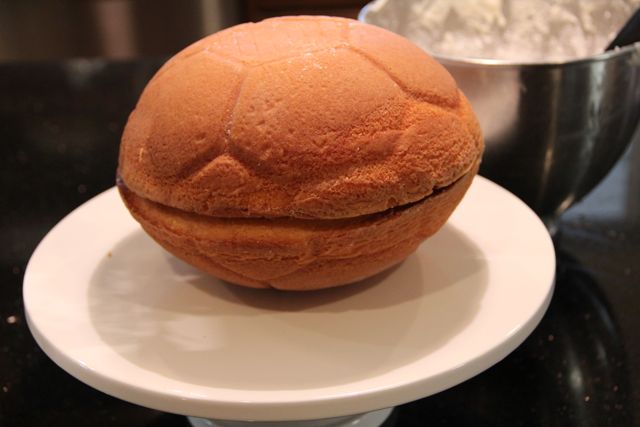
At this point, I was really worried about how on earth I was going to be able to turn these cakes into a tea pot! I cooled the cakes in the pan for about 10 minutes. Then, after taking them out, I trimmed the top off to create a flat surface, flipping them over to their now flat side to cool completely. I saved the trimmed top of the cake to use for the lid of the tea pot.
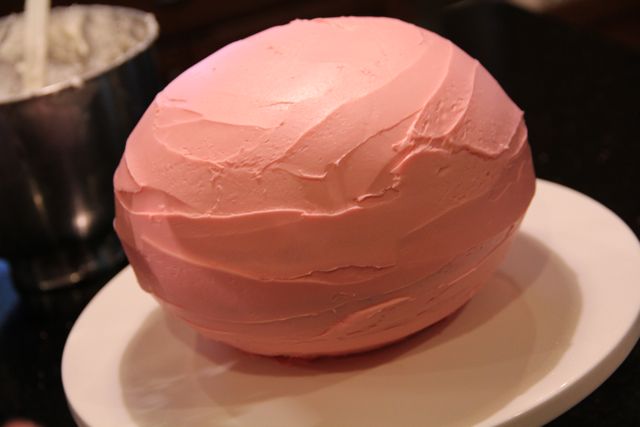
Here is what the cake looked like, just before decorating. I started with the bottom layer, holding the flat side on one hand and frosting with the other. This was so much easier than trying to frost it on the cake platter, plus I was able to add a thin layer of frosting to the very bottom of the cake which secured it to the platter after it was refrigerated.
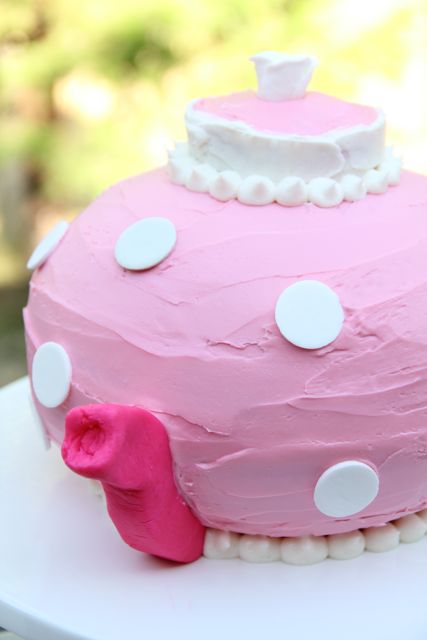
I continued by adding a layer of white buttercream frosting to the center, frosting the top half of the cake, and then adding additional frosting around the center to even it all out. As you can see, I am awful about getting the frosting all smooth!
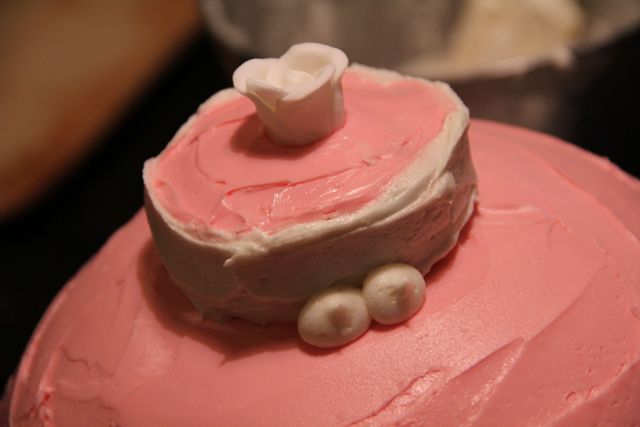
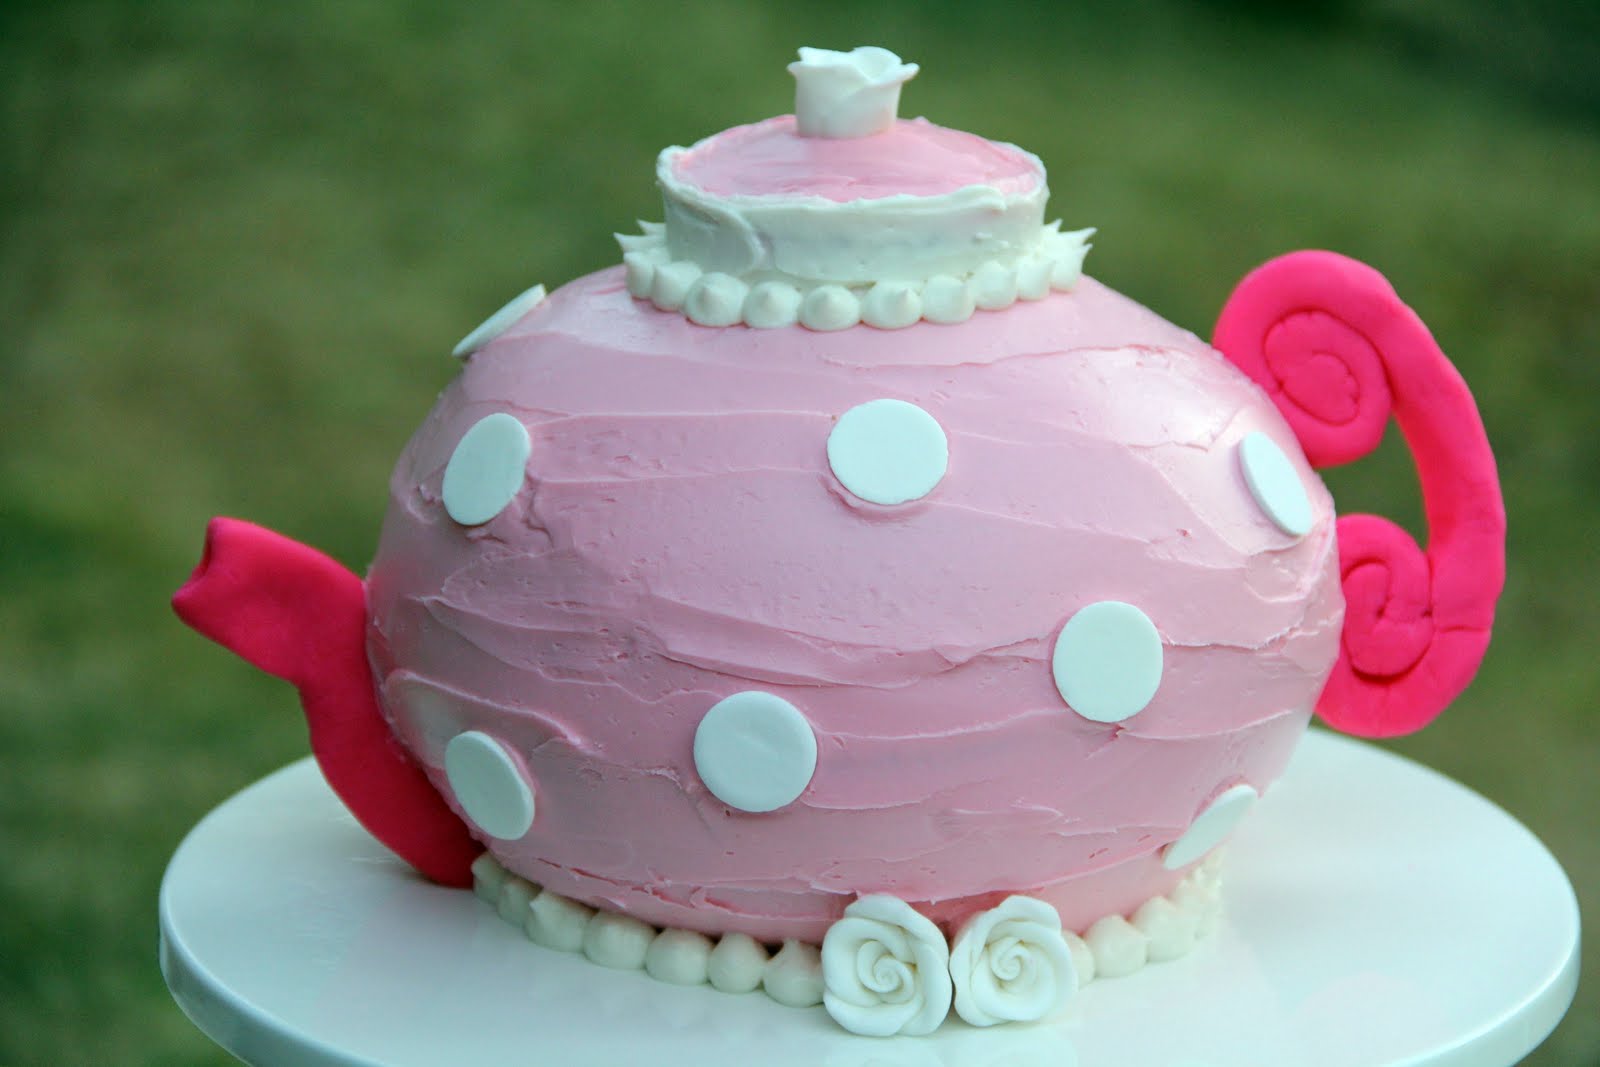
Next I created the lid using the trimmed leftover cake and the circle cookie cutter from the
Fox Run Tea Party Cookie Cutter Set
, which happened to be sitting out on the counter! I frosted the top pink and the sides white. Most of the cakes I had seen online used balls of fondant for the ball on top, but I remembered that I had a few
white icing roses
leftover and thought I would try using one of those first. I loved how it looked! So I then added the two last roses to the base of the cake, as you can see in the completed photos.

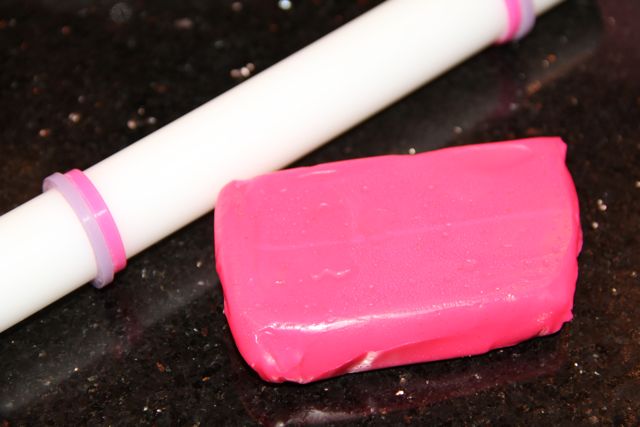
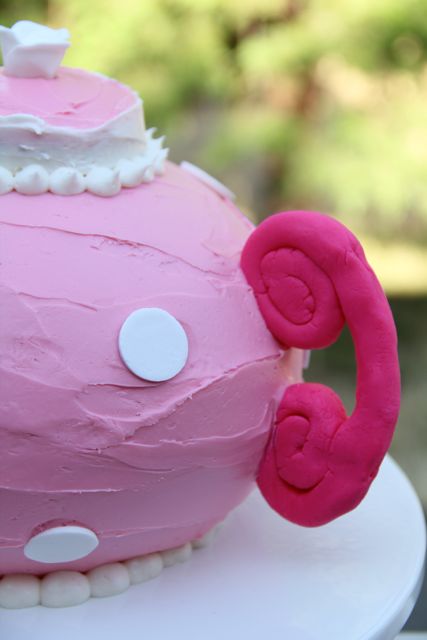
Next I had to figure out how to make a handle and spout… I almost opted to just make them out of card stock, but since I had a
Multi Pack of Neon Colors Fondant
(a gift from my mother-in-law), I decided to attempt making them with the neon pink fondant package. As I stood staring at the cake, trying to figure out how to accomplish this – with one hand on my hip, unconsciously forming a handle – my sister Mary made he laugh as she started singing “
I’m a little tea pot, short and stout…” I love it when my sisters visit!!

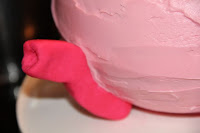
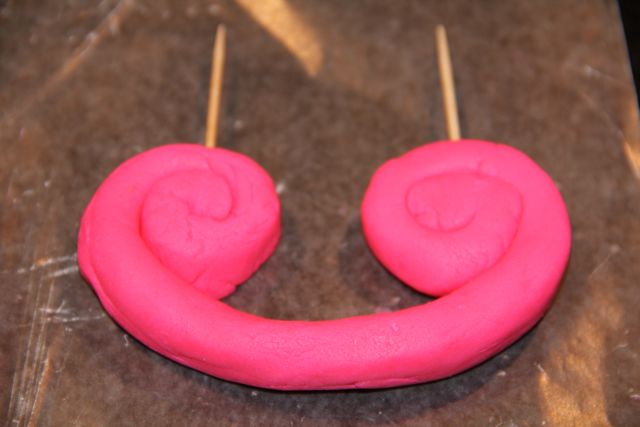
I didn’t end up using the fondant roller pictured above. What I did was break the fondant block in half, rolling half of it into a long roll and then creating a handle by rolling the edges, like a cinnamon roll. I then made a long rectangle block for the spout, using my finger to create an indentation on the end. To attach them to the cake I ended up using a combination of wooden skewers and toothpicks. You can only see one toothpick on each end of the handle, but what I ended up using was a shortened skewer and two toothpicks on each end, sticking them into the cake to secure. For the spout I molded the rectangle block to the shape of the cake, sticking a wooden skewer through the top of the spout and covering the end with a little dot of extra pink fondant. Here are a couple more pictures that I took the following morning:
Tip: I probably should have made the handle and spout at the same time that I baked the cakes, allowing them to dry. When the fondant is fresh and moist, it is very easy to mold, but when allowed to dry it becomes hard and won’t fall apart or lose it’s shape.
To complete the cake I used some white Necco Wafers (another thing that I just happened to have in my box of decorating supplies) and added “pearls” of white icing using a round icing tip to the base and the bottom of the lid.
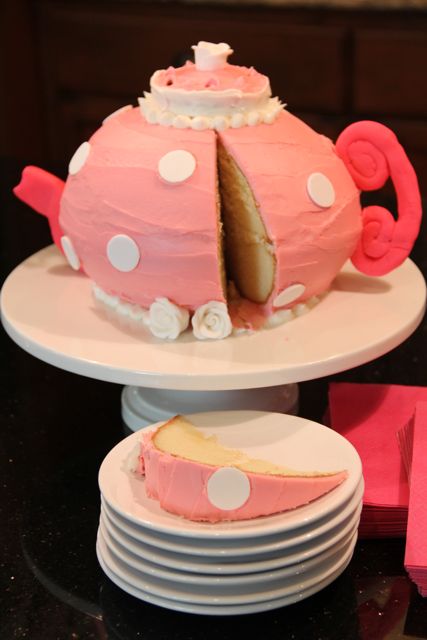
I was a bit worried about how I was going to cut the cake, but even that wasn’t as hard as I envisioned, and it held up beautifully. When I got to the last few pieces it did want to tip over, so at that point I laid the rest on it’s side. There wasn’t much left at the end of the party!
I have so many pictures that I am dying to share with you all, but I will have to come back to that later. Hope you are all having a great day!
Prayer of Mothers
Father in heaven, grant me the grace to appreciate the dignity which you have conferred on me. Let me realize that not even the Angels have been blessed with such a privilege—to share in your creative miracle and bring new Saints to heaven. Make me a good mother to all my children after the example of Mary, the Mother of your Son. Through the intercession of Jesus and Mary I ask your continued blessings on my family. Let us all be dedicated to your service on earth and attain the eternal happiness of your kingdom in heaven. Amen.
")


I love how you put the candles around the top!! Thanks for showing how it looked as you cut, the pieces were beautiful!!
You really did a wonderful job and I'm sure all the girls loved it!!!
One of my daughter's birthday's is on friday, she wants a piano cake…..got some dark chocolate Kit Kats…not sure how this is going to turn out!!!
I LOVE it! I'm totally going to convince one of my girls to have a tea party birthday just so I can make one of these. I'm thinking maybe Cupcake's second birthday party, before she gets old enough to make requests!
Jamie,
I think the KitKats are a great idea. Have you seen this cake?
This is beautiful!!! How creative!!
Great idea Jamie! I can't wait to see how it turns out. And I love the link Charlotte posted!
And, Charlotte, I love that you already have Cupcake's first couple birthdays planned out! Any suggestions for Rose's 2nd birthday this December… That is, if I'm don't happen to deliver two weeks early! 😉
Thanks Charlotte!! Love the link…wasn't planning on baking 2 9×13 cakes though, that's a lot of cake….
Beautiful Job!!!
How blessed your children are to have such a loving mother.
Love, Lori
Amazing job! You're always inspiring.
Just another suggestion for any comment readers: you can also use 2 pyrex bowls for the cake pans. Then use part of a candy cane (iced) for the handle and some straws (iced) for the spout. Also, an icing covered mini-muffin for the lid. Just some thoughts!
Super cute! You did a great job! They are fun to make, I did a tea pot one last year for my daughter too. Here's the link to pics: http://www.ourheavenlyhomestead.com/2010/09/tea-for-a-princess/
I have so enjoyed your blog. I found it when I was looking for info on the Little Flowers. We are going to start one at our church and your notebooking idea is perfect! Thank you so much for sharing all that you do.
Blessings,
Maria @ http://www.ourheavenlyhomestead.com