")
A Hobbit Birthday Party!
This past Thursday Rascal turned 11 years old! For this birthday, having just finished reading (and listening to) The Hobbit and the Lord of the Rings Trilogy, he asked if we could have a Hobbit themed birthday party! It was so much fun (even if I did spend too much time in the kitchen!) and I’ve been so excited to share the pictures with you all.
Decorations
“In a hole in the ground there lived a hobbit. Not a nasty, dirty, wet hole, filled with the ends of worms and an oozy smell, nor yet a dry, bare sandy hole with nothing in it to sit down on or to eat: it was a hobbit hole, and that means comfort.”
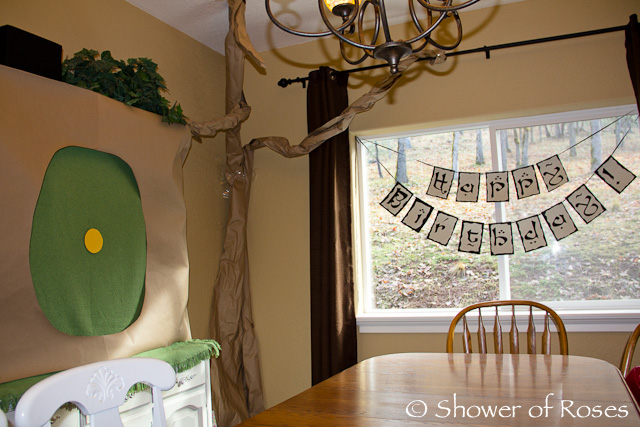
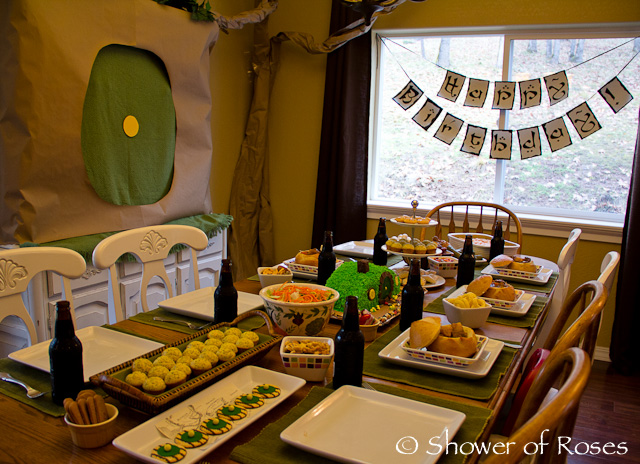
For decorations I used a few things I had around the house to create a “Hobbit Hole” out of our dining room hutch! We covered the front with a green blanket, cut a yellow circle out of card stock, and then cut two pieces of brown paper to create the round door hole. We placed a green plant on top along with a black closet maid tote on top as the chimney.
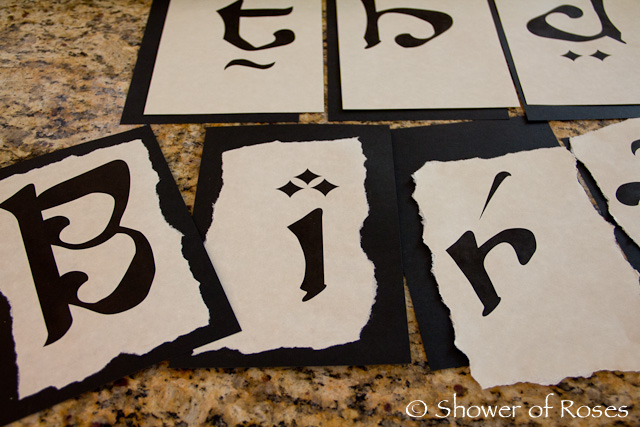
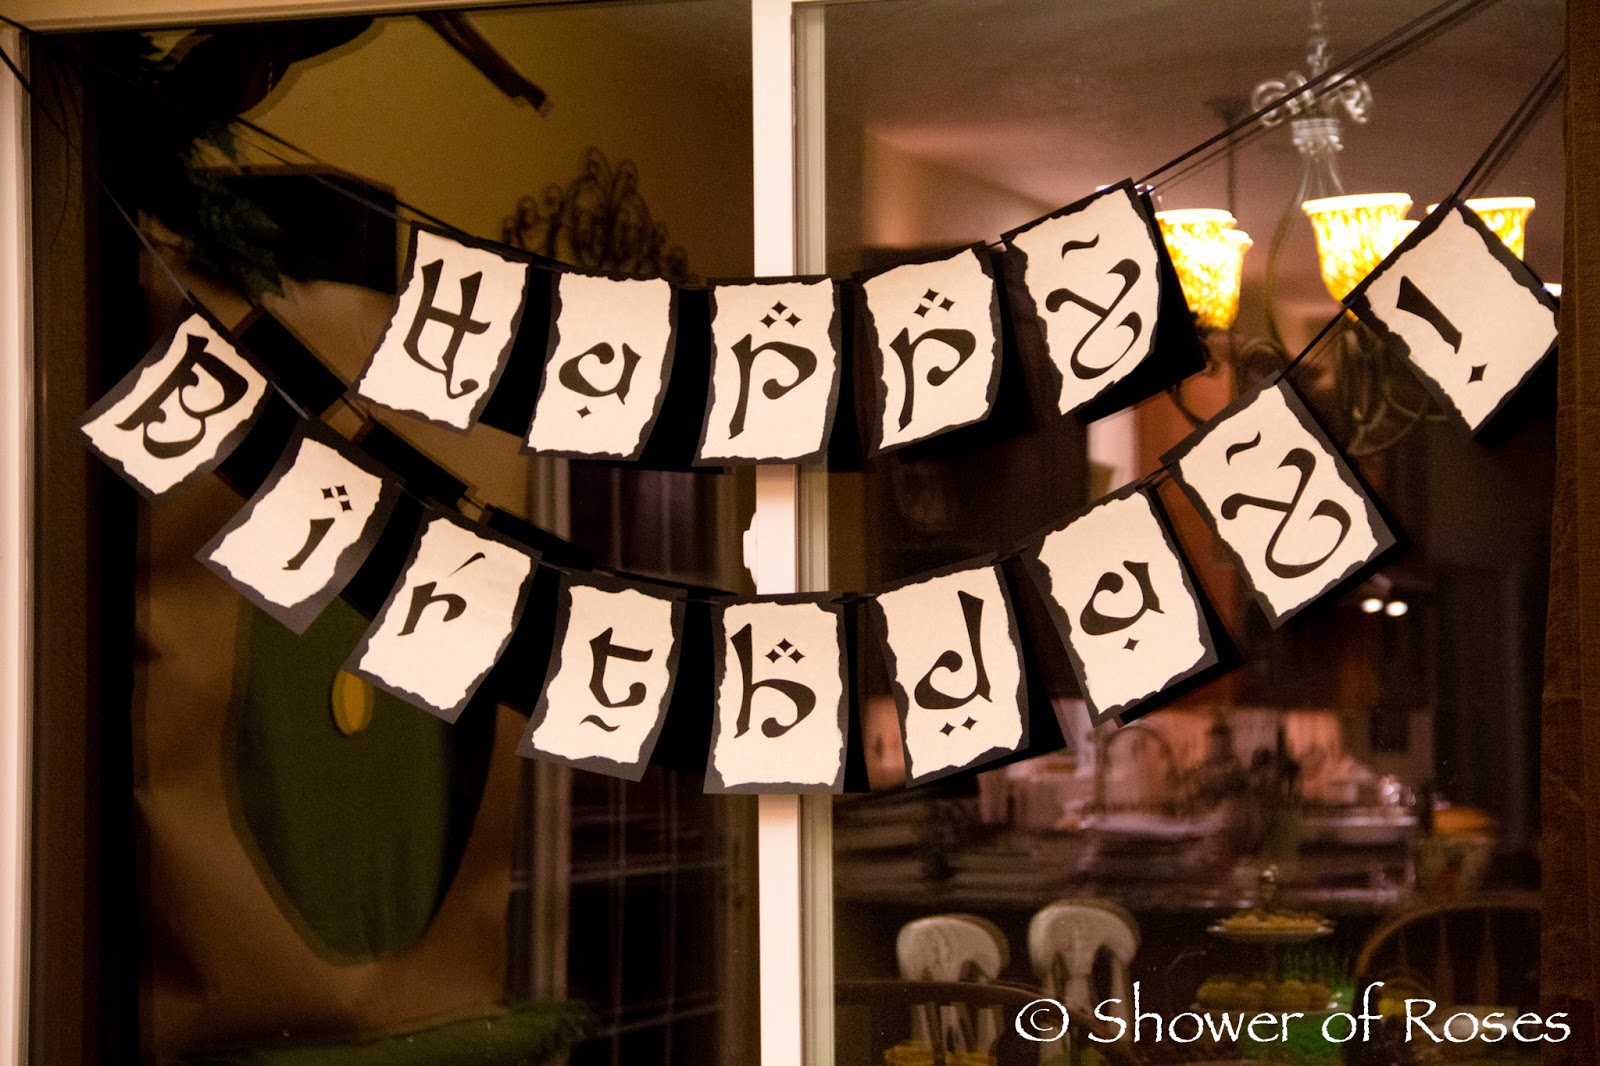
The banner was inspired by Charlotte’s lovely Lord of the Rings Banner! In fact, after hearing how slightly overwhelmed I was on Tuesday night (while talking to her during the girls Irish Dance class before going shopping) she kindly whipped up a document and emailed it to me! All I had to do was print it on parchment paper, tear the edges and glue the letters onto some 8″x5.5″ black card stock! Thank you dear friend, you are the BEST!
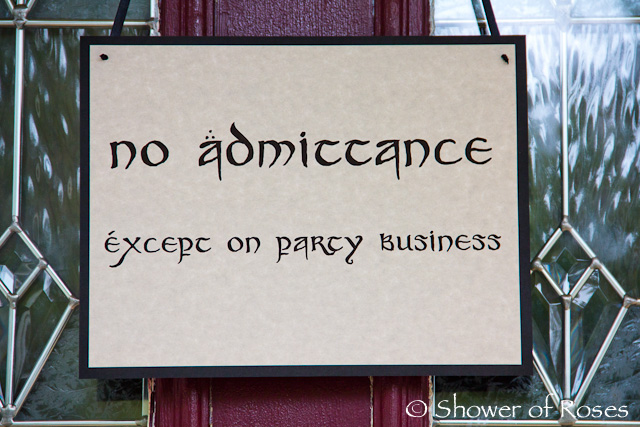
You can download the banner document here. I also created a door sign using a “Party Business” font I downloaded online. You can download that document here.

We also made a “tree” out of brown paper, which turned out out looking more like an Ent! 🙂
An Unexpected Journey
“Sorry! I don’t want any adventures, thank you. Not Today. Good morning! But please come to tea -any time you like! Why not tomorrow? Good bye!”
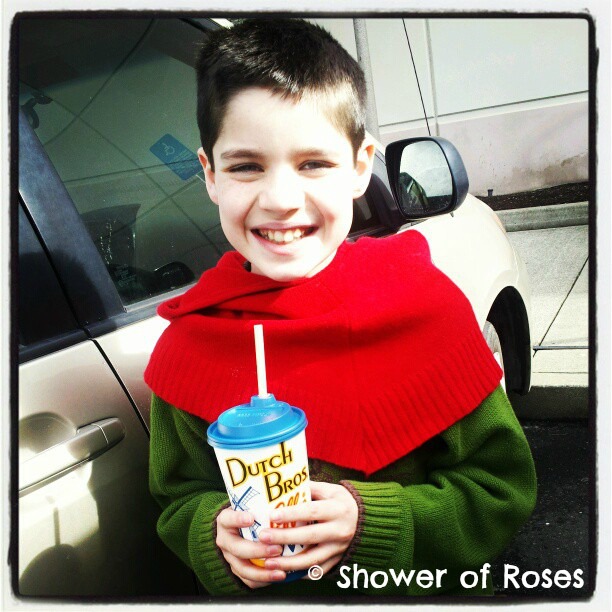
We started the day with a quick trip to town for a Birthday Coffee Drink and found some beautiful golden rings while we were at the store to bring back for 2nd Breakfast!
Defeating Smaug
“[S]ome of the younger people in the town openly doubted the existence of any dragon in the mountain, and laughed at the greybeards and gammers who said that they had seen him flying in the sky in their young days.”
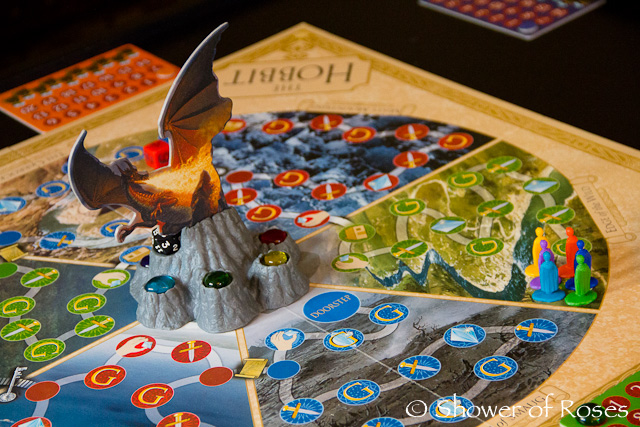
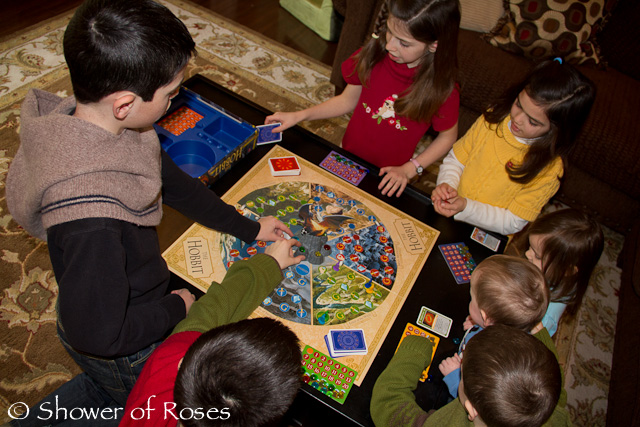
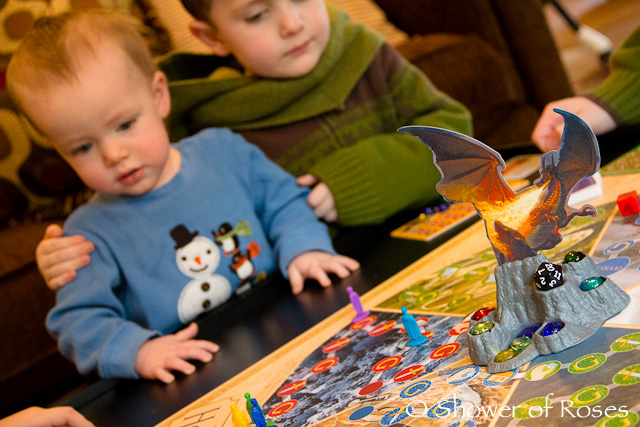
We spent some of the afternoon playing The Hobbit Boardgame!
“The mere fleeting glimpses of treasure which [the dwarves] had caught as they went along had rekindled all the fire of their dwarvish hearts; and when the heart of a dwarf, even the most respectable, is wakened by gold and by jewels, he grows suddenly bold, and he may become fierce.”


“The dragon is withered, His bones are now crumbled; His armour is shivered, His splendour is humbled.”
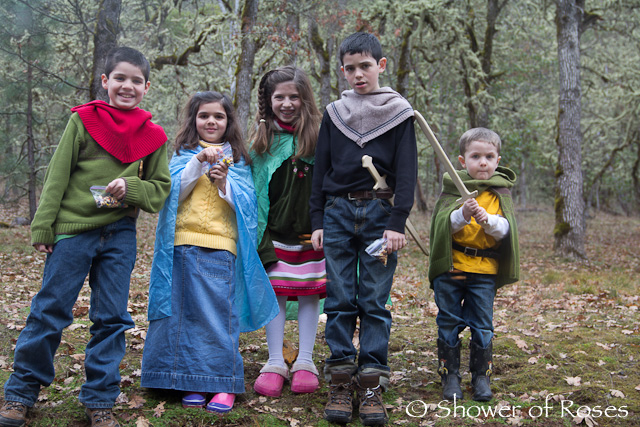
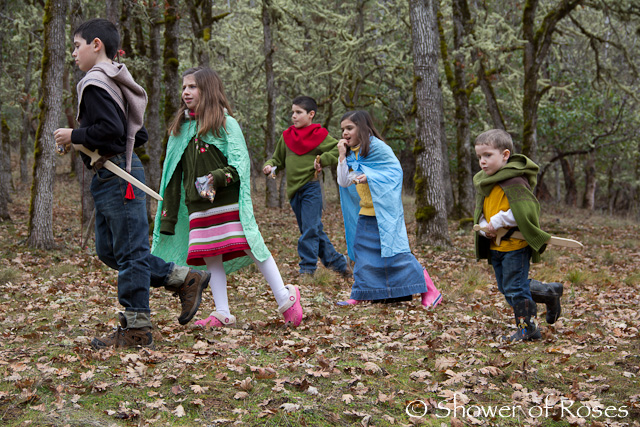
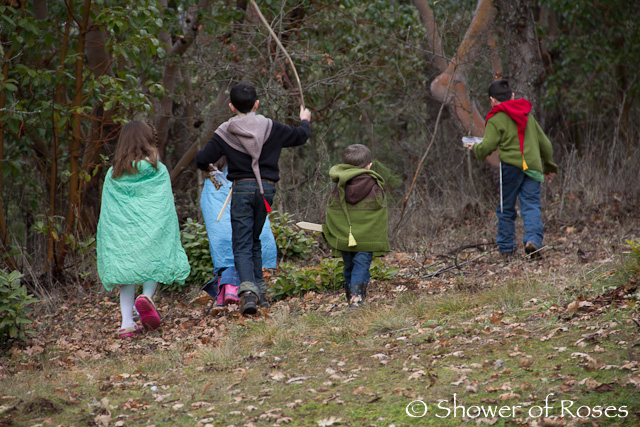
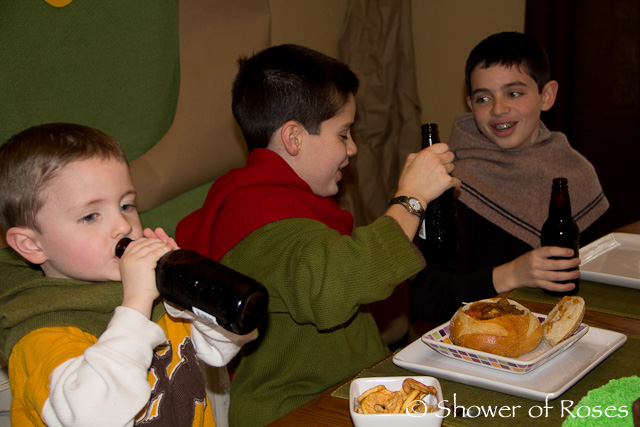
An Afternoon Adventure
“I am looking for someone to share in an adventure that I am arranging, and it’s very difficult to find anyone.’ I should think so — in these parts! We are plain quiet folk and have no use for adventures. Nasty disturbing uncomfortable things! Make you late for dinner!”

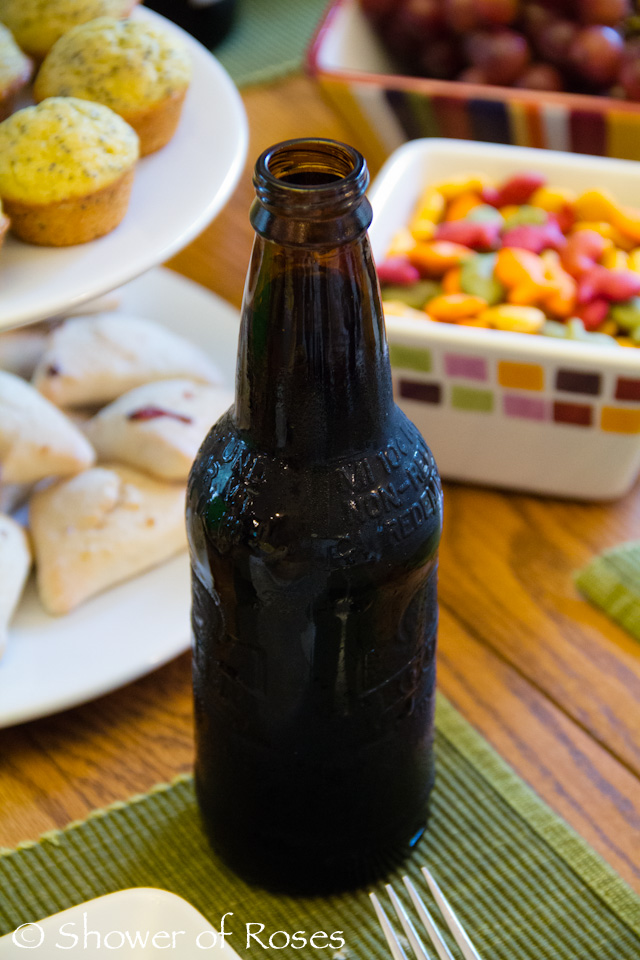
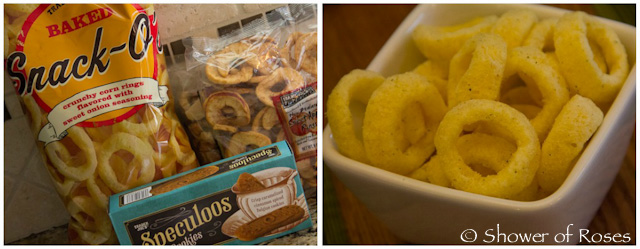
As an extra snack, while I finished making dinner, I gave the kids baggies of Mountain Trail Mix and sent them outside to find their own adventure.
“Then something Tookish woke up inside of him, and he wished to go and see the great mountains, and hear the pine-trees and the waterfalls, and explore the caves, and wear a sword instead of a walking stick.”
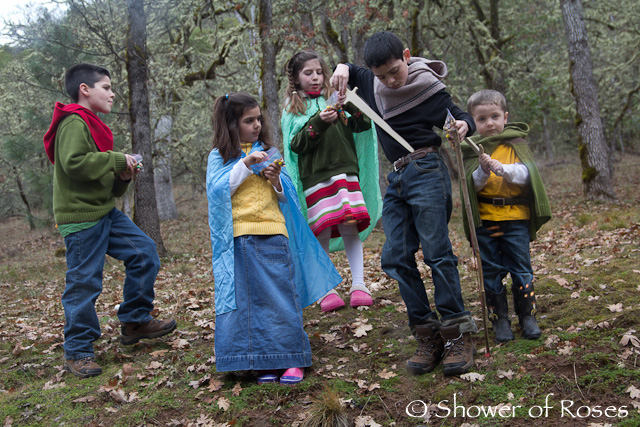
“There are no safe paths in this part of the world. Remember you are over the Edge of the Wild now, and in for all sorts of fun wherever you go.”
“Far over the misty mountains cold
To dungeons deep and caverns old
We must away, ere break of day,
To find our long-forgotten gold.”
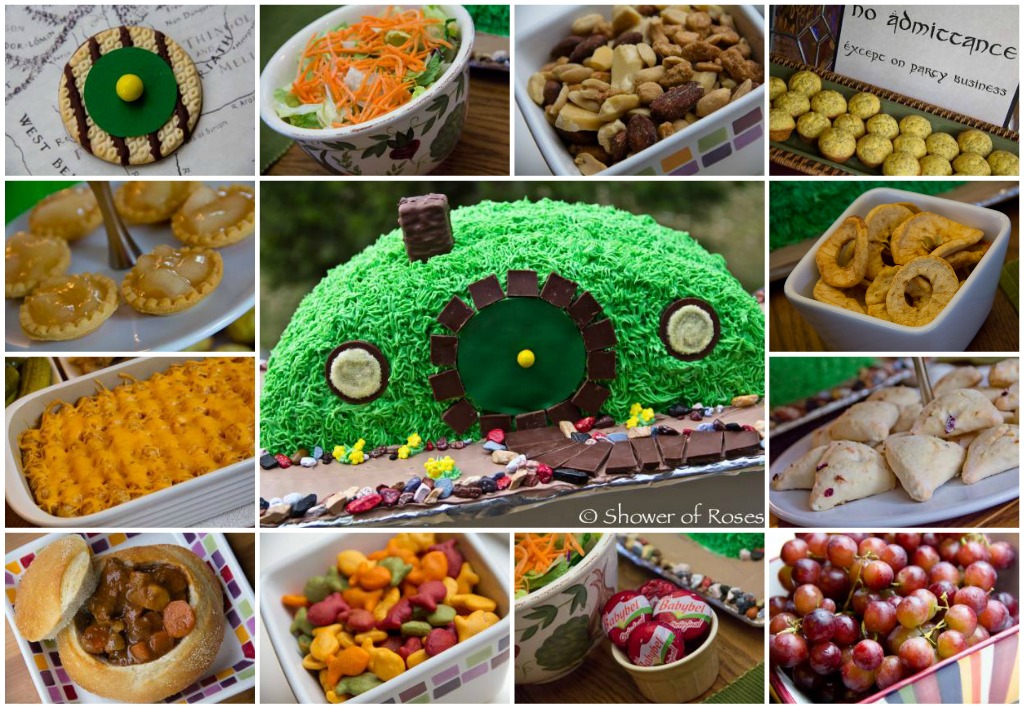
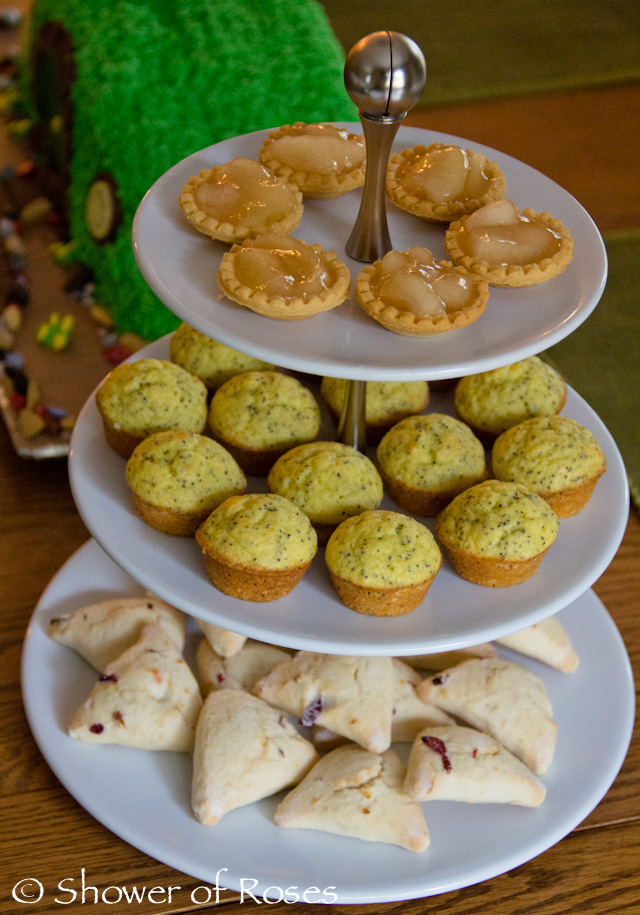
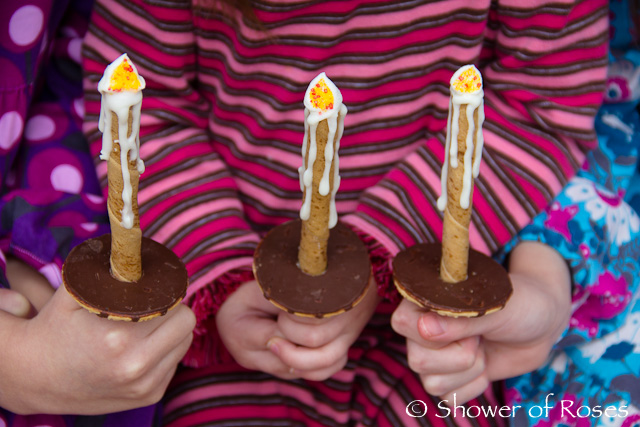
Hobbit Hole Door Cookies
“It had a perfectly round door like a porthole, painted green, with a shiny yellow brass knob in the exact middle.”
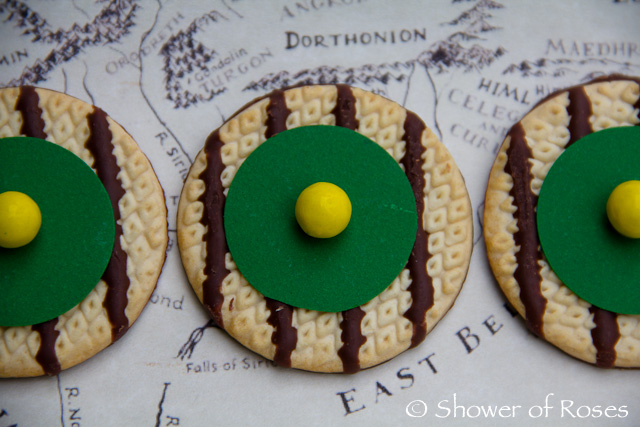
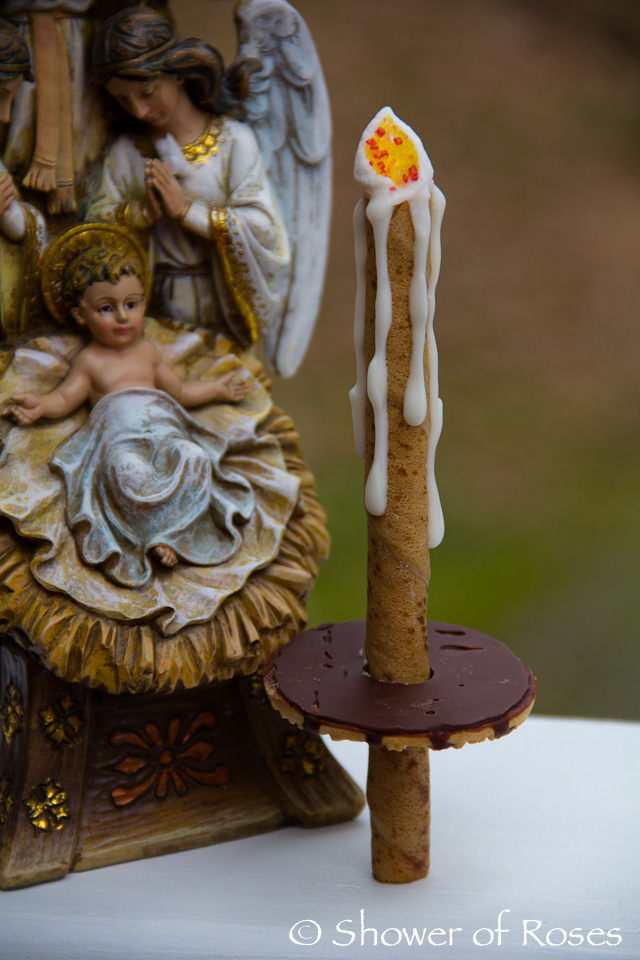
As I was thinking about what to do with the leftover Green Sugar Sheet and Sixlets from the birthday cake, I decided to try and make Hobbit Hole Cookies (inspired by these) using the leftover Fudge Stripes from this year’s Candlemas Cookie Candles with Drip Plates!
I used my circle hole punch to cut the sugar sheet and added a yellow Sixlets in the center with a dab of yellow sparkle gel. I thought that they turned out so cute, and they only took a few minutes to make!
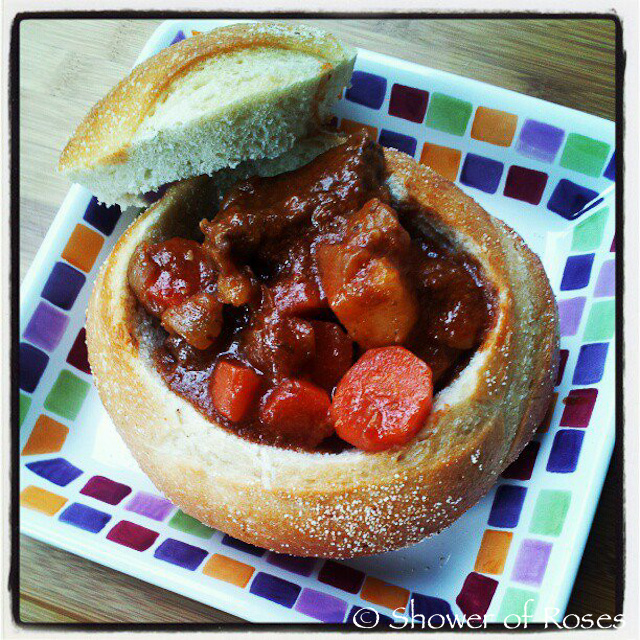
Dinner
“If more of us valued food and cheer and song above hoarded gold, it would be a merrier world.”

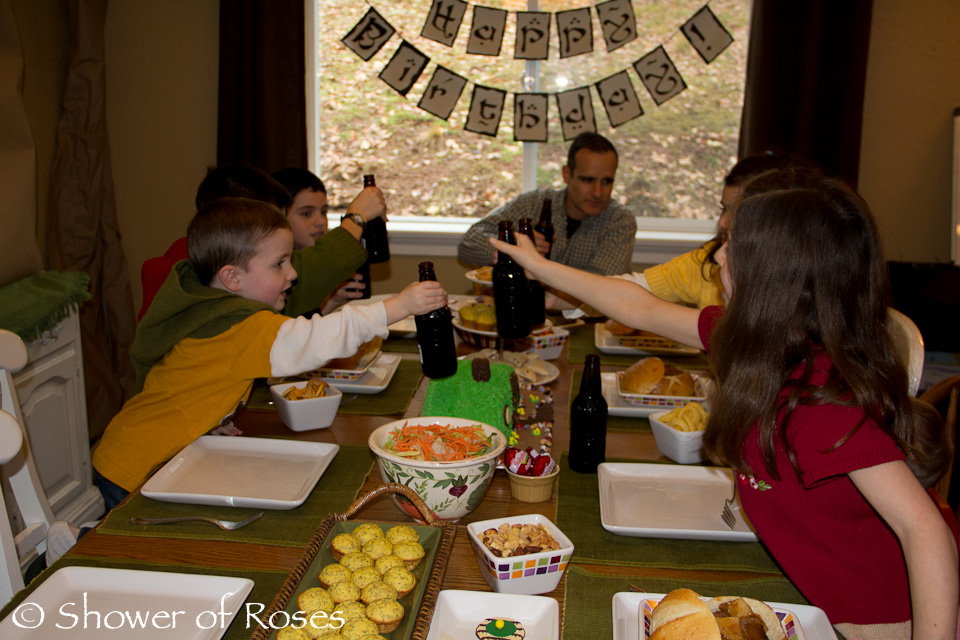
“The dwarves ate and ate, and talked and talked, and time got on. At last they pushed their chairs back and Bilbo made a move to collect the plates and glasses. “I suppose you will all stay to supper for cake?” he said in his politest unpressing tones. “Of course!” said Thorin. “And after. We shan’t get through the business till late, and we must have some music first. Now to clear up!”
Hobbit Music
“Now for some music!” said Thorin. “Bring out the instruments!”
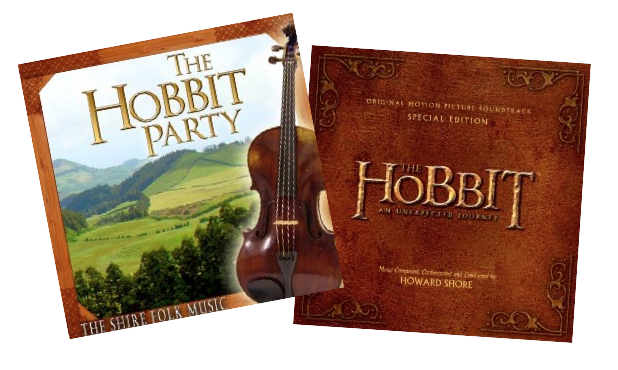
The Hobbit Party. Shire Folk Music
The Hobbit: An Unexpected Journey (soundtrack)
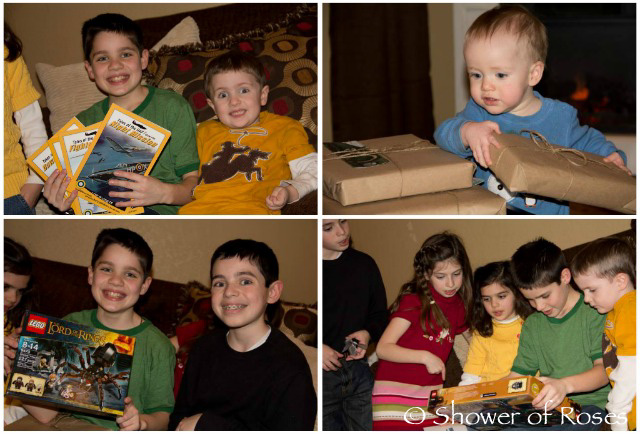
Birthday Gifts
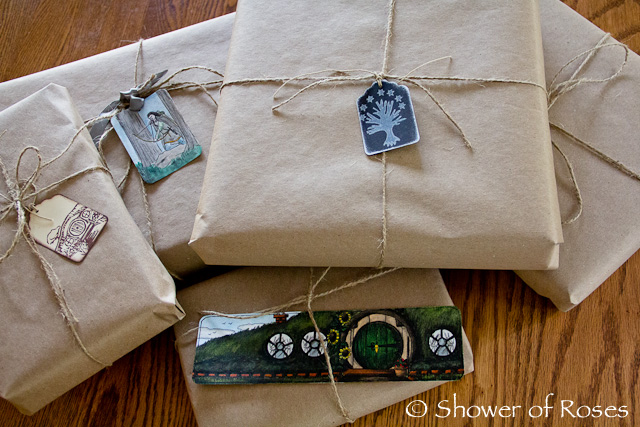
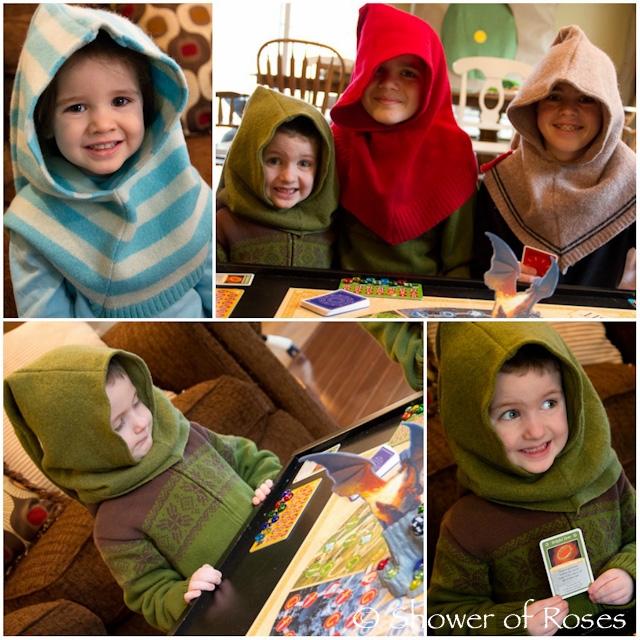
We wrapped his birthday gifts in brown paper, tied with string, and attached gift tags and a beautiful new Hobbit Bookmark hand painted and ordered from The Fig and Thimble! (NOTE: The wonderful dwarf hoods the children are wearing were also all made by The Fig and Thimble!)
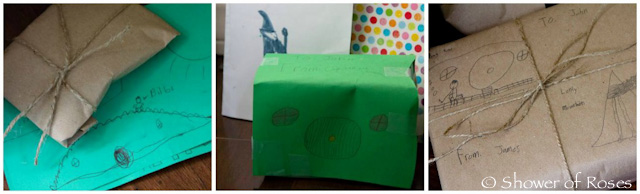
The older children also wrapped up gifts for their brother! Twinkle Toes choose a couple mini-figures from Series 9 (and was very happy to discover that one of them was the Forest Maiden with a bow… Yep, Mom is getting good at “guessing” what’s inside the packages! lol), Chiquita wrapped up the PB&J Candy Bar that the tooth fairy had recently left under her pillow (inside a little hobbit hole box she decorated!), Snuggles wrapped up some of his coins and we picked up some trail mix when we were at the store to add, and Captain did many extra little jobs and chores to save for a little lego set (the one that comes with Samwise Gamgee) for his brother.

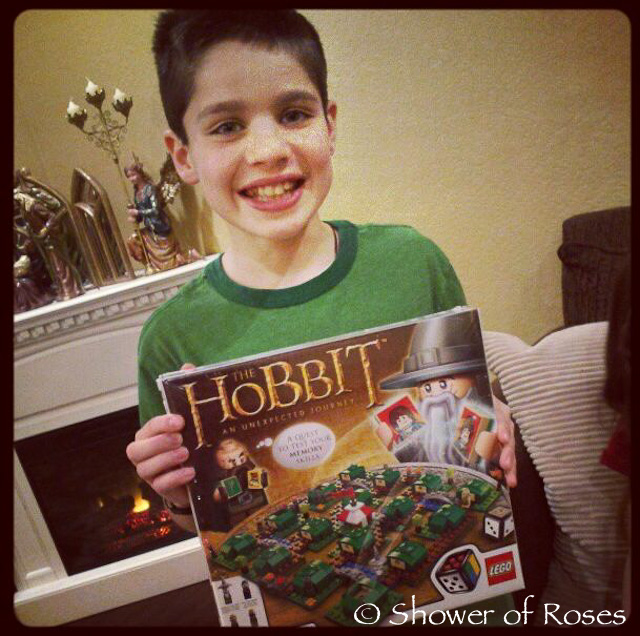
Rascal’s other gifts include the next four books in the Tales of the RAF series (since he enjoyed the first book which he received in his Christmas stocking so much), The Hobbit Lego Game, Hobbit Attack of the Wargs Legos, Lego Empire State Building, and a World War II Discovery Kit.
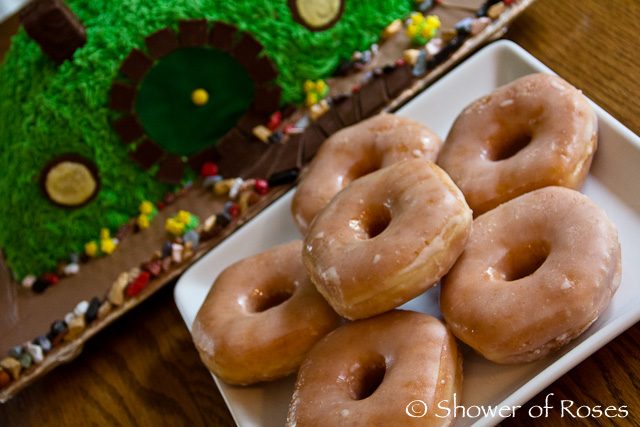
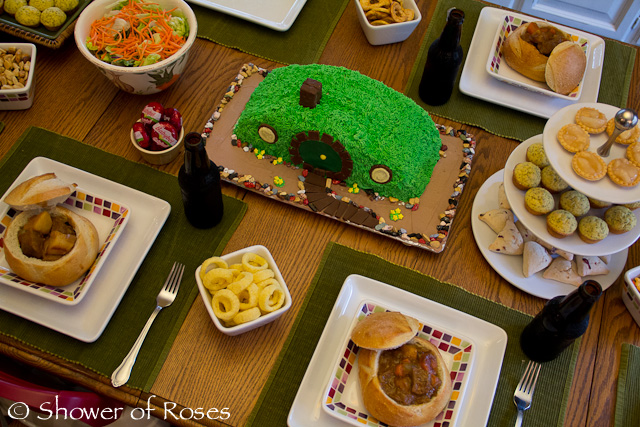
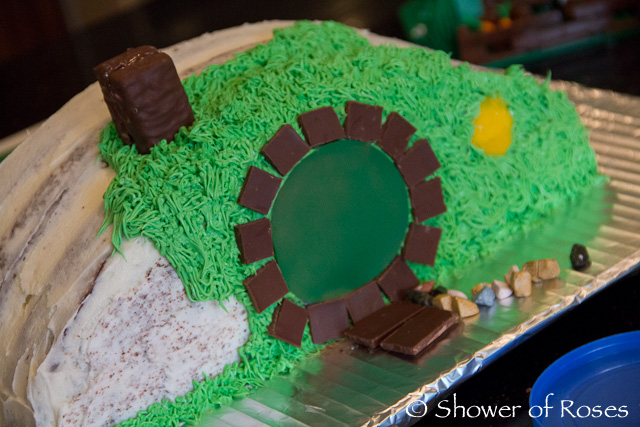
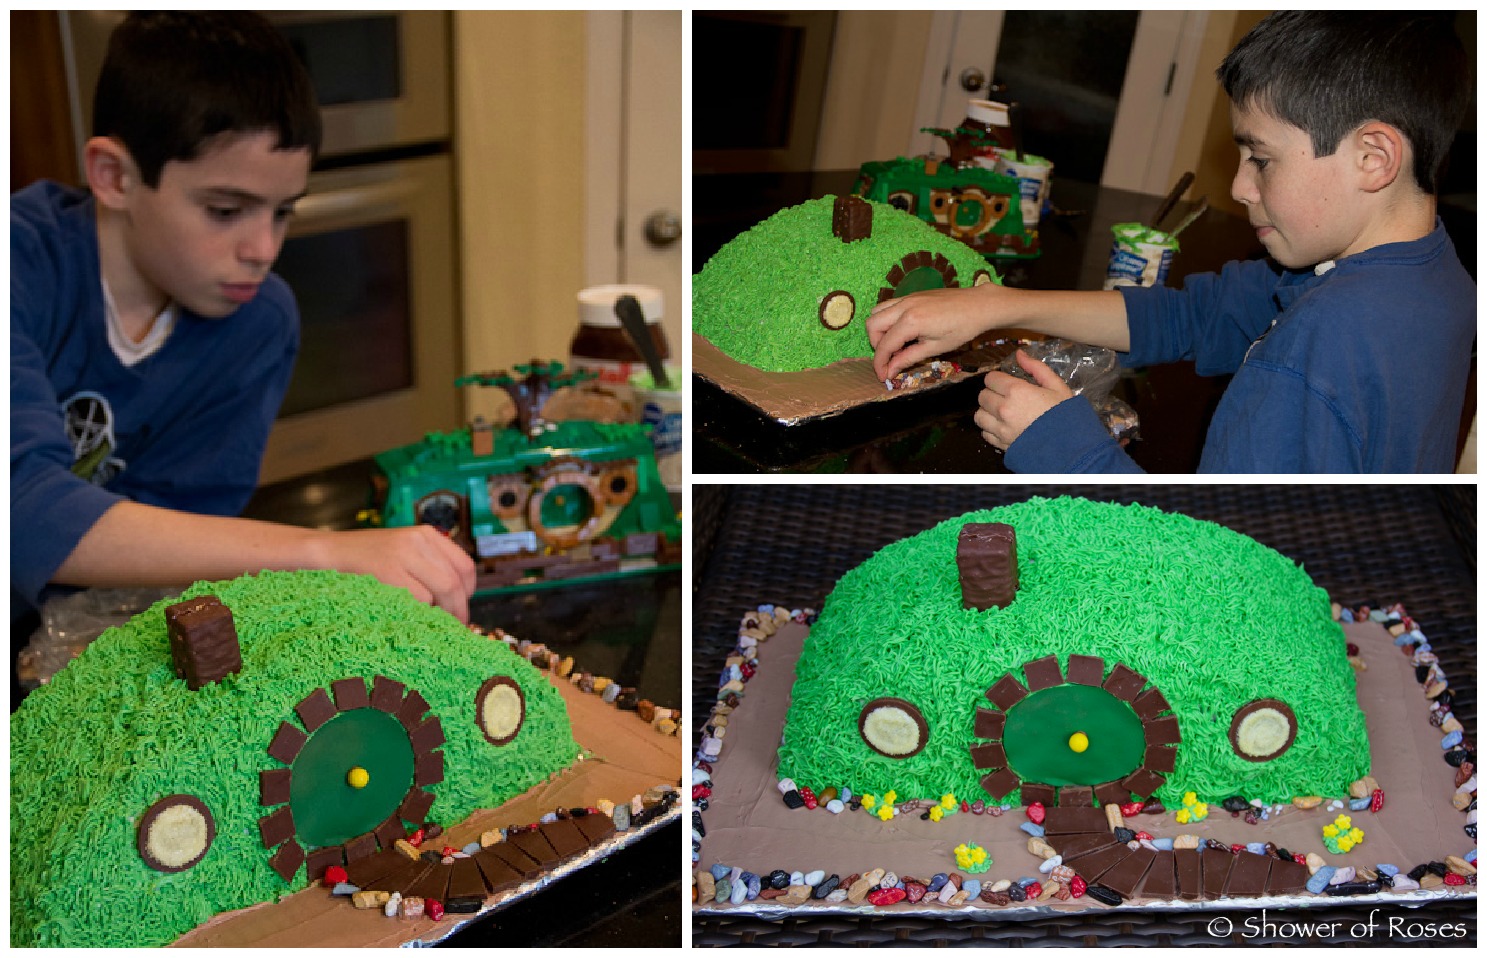
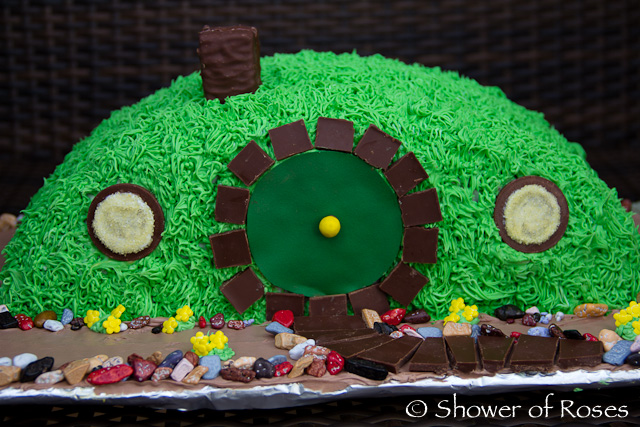
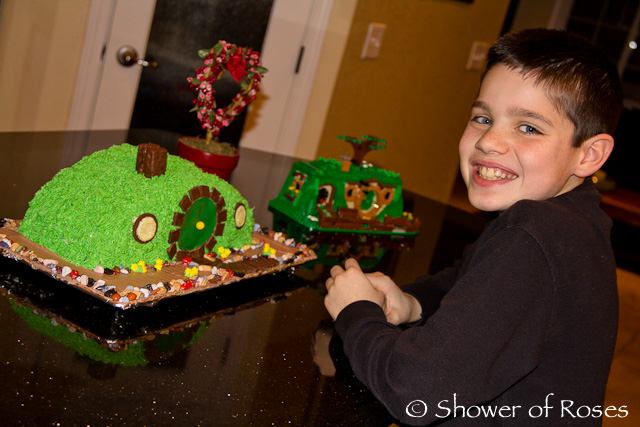
Bilbo’s Hobbit Hole Birthday Cake
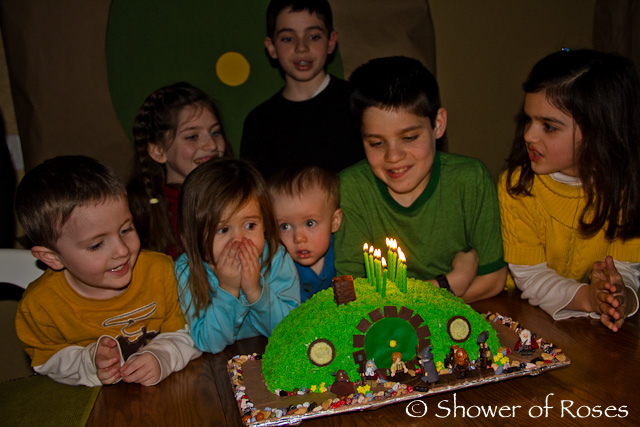
The birthday boy loved his cake and added the finishing touches just before we sang Happy Birthday!


“You are a very fine person, Bilbo Rascal, and I am very fond of you; but you are only quite a little fellow in a wide world after all!”
{pretty, happy, funny, real} :: Rascal’s Hobbit Birthday
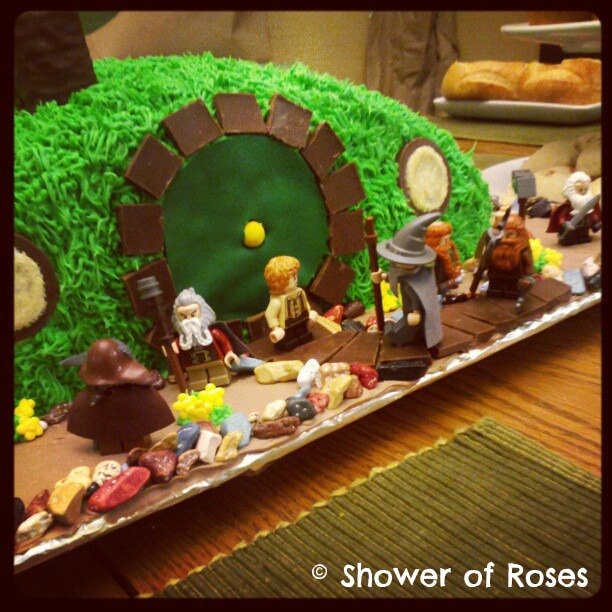

Bilbo’s Hobbit Hole :: A Hobbit Themed Birthday Cake
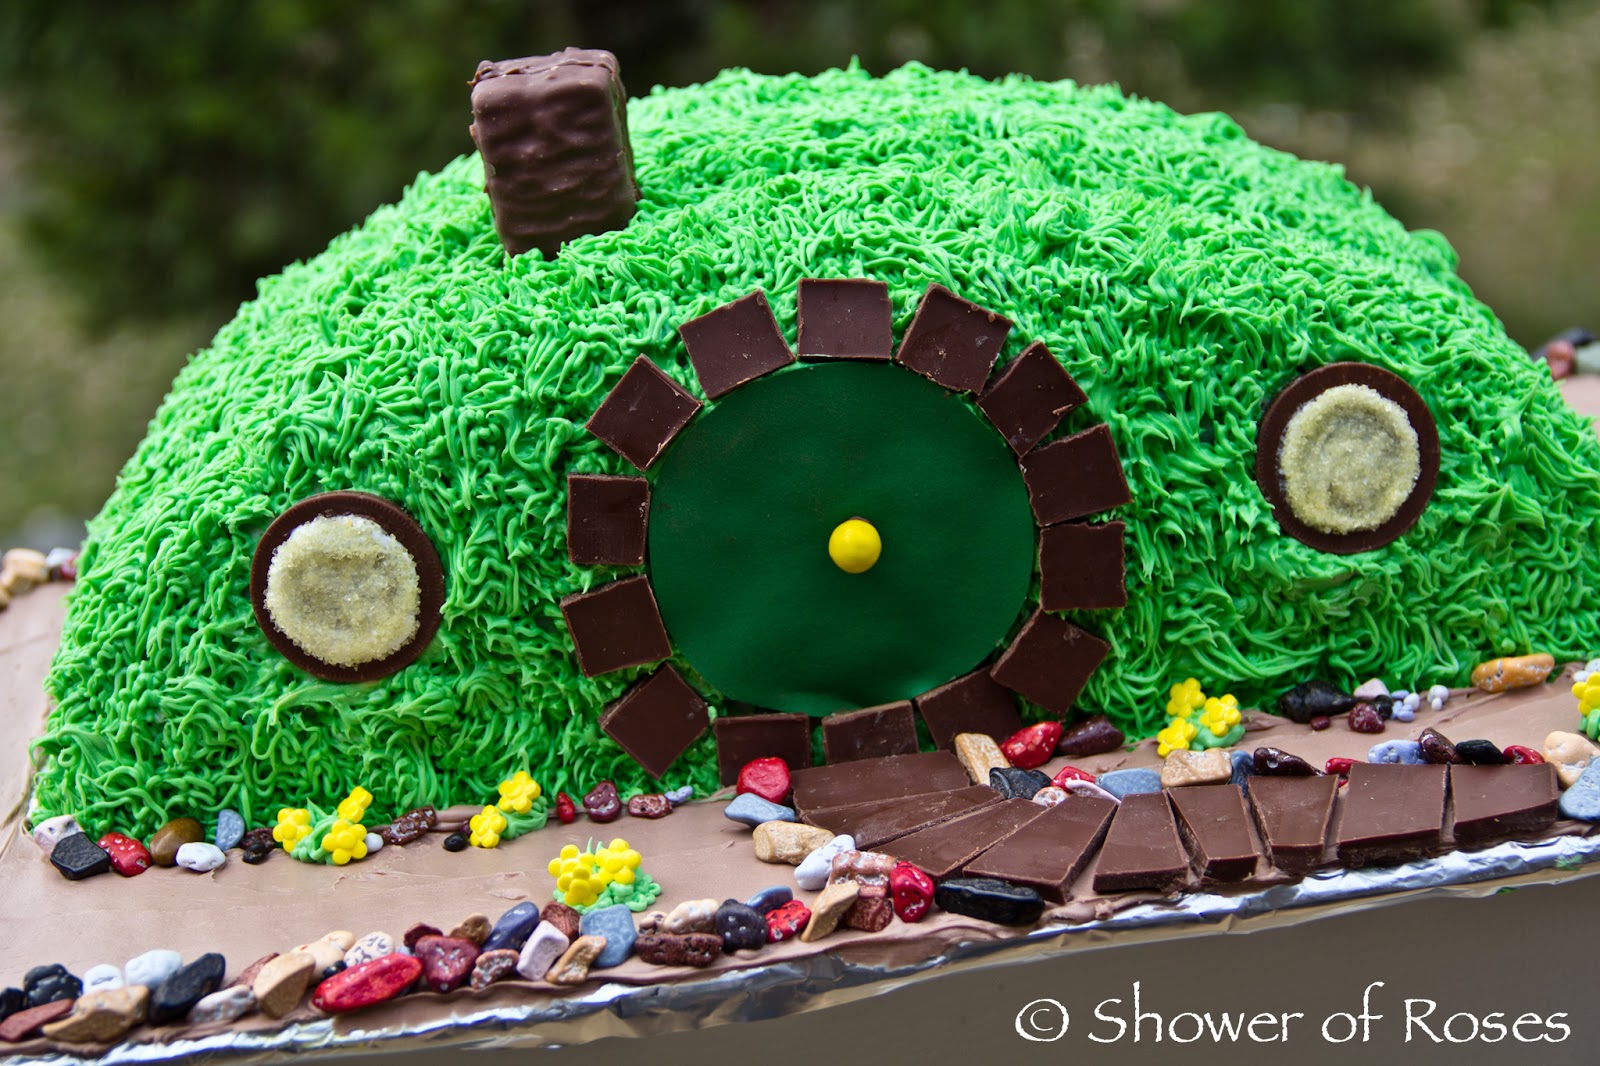
After listening to the excellent unabridged version of the Hobbit, and watching the movie, Rascal requested a “Hobbit” themed birthday for his 11th birthday this year! Our cake turned out differently, but was mostly inspired by Charlotte’s recent Hobbit Hole cake and Rascal’s Hobbit Hole Lego Set. Usually I wait until the kids are in bed to decorate their cakes, but today I decided to take advantage of the long nap Bud took this afternoon. So now I get to share it with you tonight!
My Supplies:
2 boxes cake mix (Rascal choose Triple Chocolate)
Oval Cake Pan (I have the Oval Pan set which I love! I first used them for our Nesting Doll Cake and also use them each Easter for Egg shaped cakes! For this cake I used the 13.5″x9.8″ Oval)
Filling/Frosting of choice
2 containers white frosting
leaf green icing color
Wilton Tip #233 (for grass) with decorating bag and coupler
Nutella mixed with a little of the extra white icing (for the ground – chocolate frosting or brown sugar would also work)
1 granola bar (for chimney)
2 large chocolate coins (for windows)
yellow sprinkles (or yellow frosting)
1 green sugar sheet (for door)
1 yellow Sixlets (for door knob)
Candy Rocks (decorations)
Candy Flowers (I used these.)
2 Hershey Chocolate Bars (for around door and walkway)

Assembling the Cake:
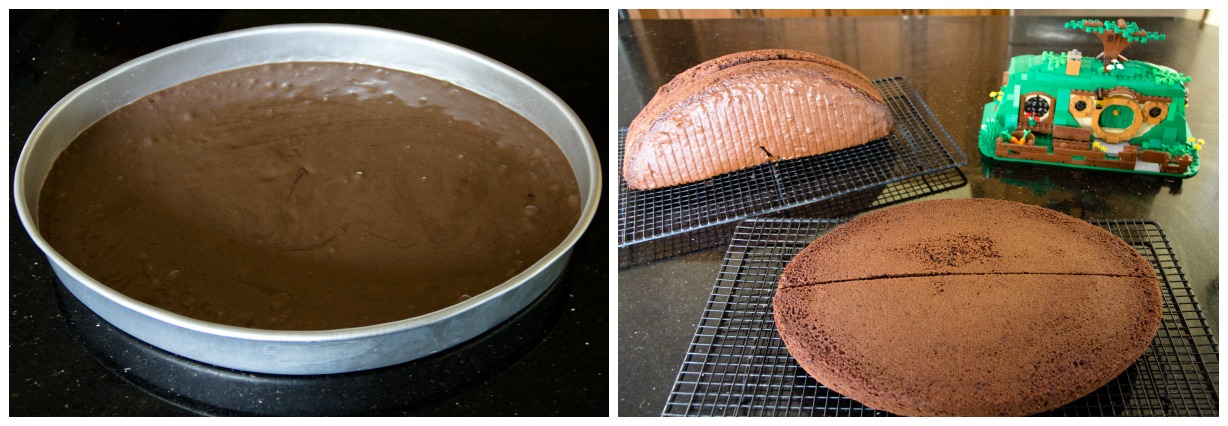
Bake two oval cakes. Cool. Slice each cake in half lengthwise.
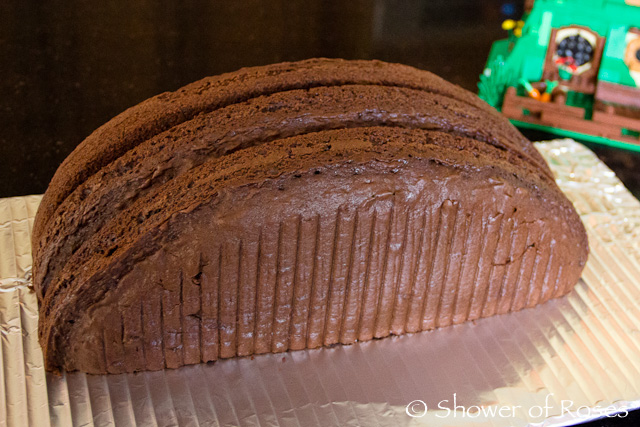
Line up the cakes on platter, filling with frosting/filling of preference. (We ended up only using 3 of the 4 cakes halves, and 2 – one cake – might have been enough, but we liked the look of the three cakes halves best.) I then covered the cake with a layer of white frosting. (I usually then stick it in the freezer to harden, but didn’t this time and regretted it later!)

Make the chimney. Slice a granola bar in half and stick the two halves together (we used a little Nutella). Place on top of cake.
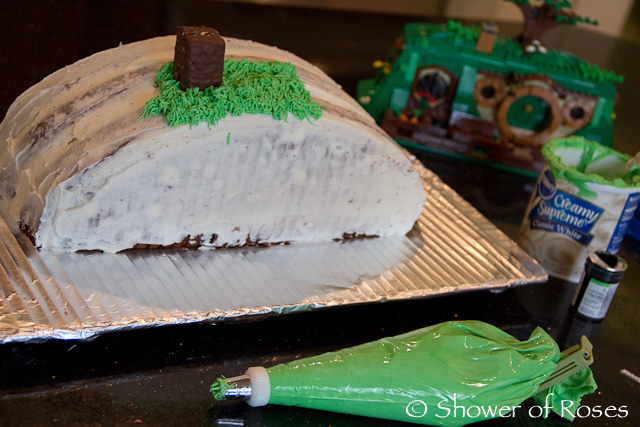
Cover the cake with green grass using tinted frosting and the grass frosting tip. This took a little while, and I bounced back and forth between it and other things, but it was fun!

At Charlotte’s suggestion I made the door with a Green Sugar Sheet! The cookie cutter helped with the size I needed and then I cut the circle out with a pair of scissors. For the yellow door knob, I just attached a yellow Sixlets with some chocolate.
My New Year’s Resolution {150 Miles Later!}
One of my resolutions, or rather challenges for myself, this new year was to do my best to improve my health and make time for exercising. It is one of the areas in my life where I have been really procrastinating. I made some great progress early last year, when I had the scare with my liver, but after I lost some weight (10% of my body weight at the time) and the problems cleared up, I lost my motivation. I’ve been struggling to keep up in many areas of my life (blogging, paperwork, emails, laundry, housecleaning, homeschooling, exercising, pretty much everything… there is just not enough hours in the day to do it all!) and my husband keeps gently reminding me that I need to stop procrastinating and JUST DO THE WORK!
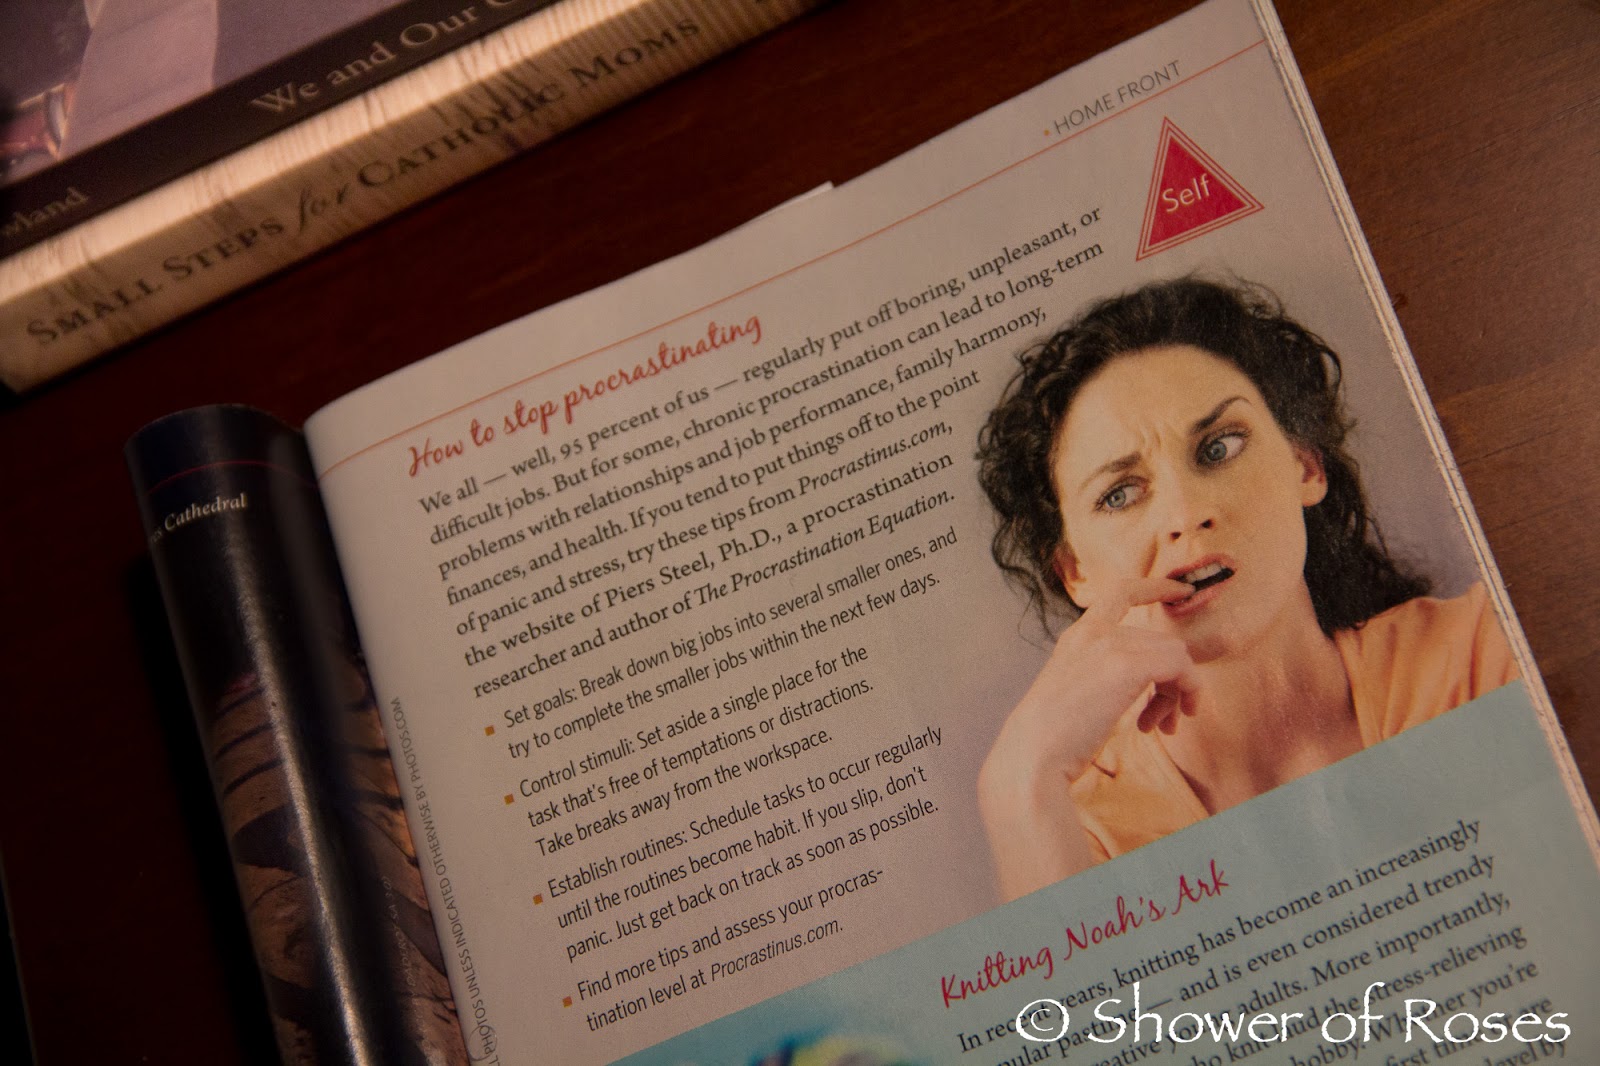 |
| I had to laugh when I found this on my nightstand one night! |
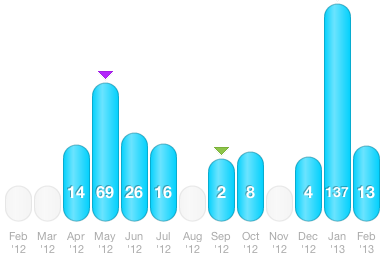
Not only do I still have plenty of weight to lose (from the last five pregnancies), I’ve also found that exercising greatly lowers my stress levels (along with my angio edema reactions) and helps me be a much happier person in general. This time of year, with all the dark and gloomy days, can be especially challenging, so I started by deciding to stop procrastinating (with exercising at least) and try and get on the treadmill every day during January.


 |
| A typical breakfast of mine on the 17 Day Diet – 2 eggs with mixed greens, onion, and tomatoes with green tea and/or coffee |
 |
| 2 pounds lost from Jan 1-Jan 18th, then I started recording my weight daily while on Cycle 1 of The 17 Day Diet |
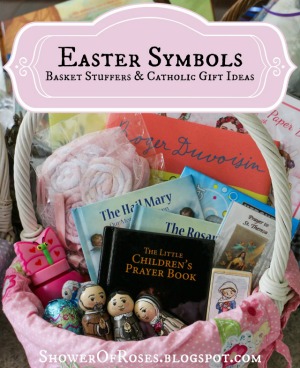
Celebrating Candlemas
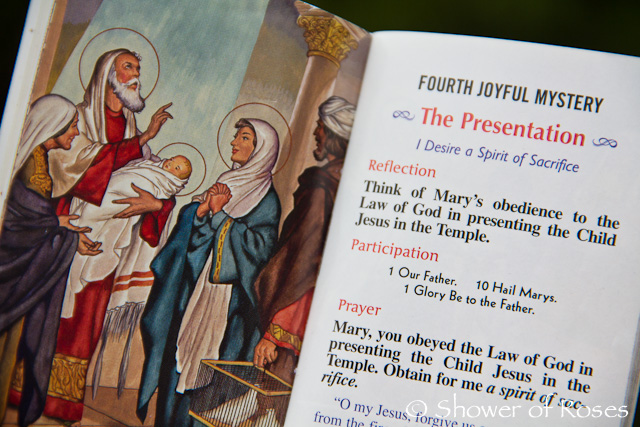
Traditionally called Candlemas, candles are blessed on this day to help us remember the words of holy Simeon who called the babe in his arms, “A light to lighten the gentiles and the glory of your people, Israel.” Luke 2: 32.
 |
| My Pocket Rosary Children’s Prayer Book |
You can scroll through all our past Candlemas celebrations here, including a Candlemas Luncheon.
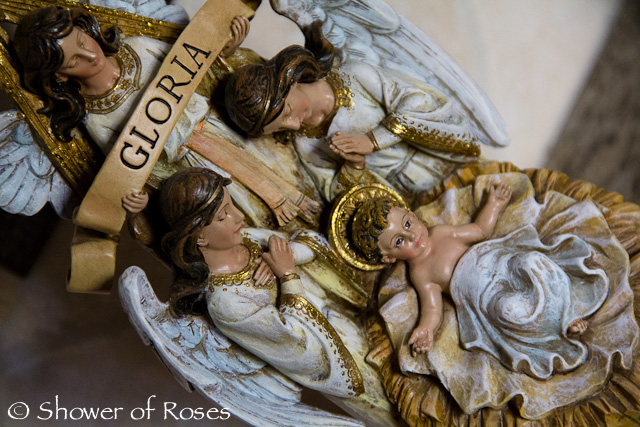 |
| Christmas Angels with Baby Jesus Statue |
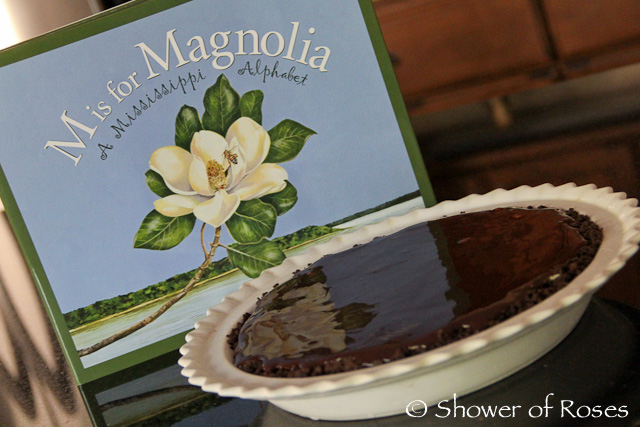
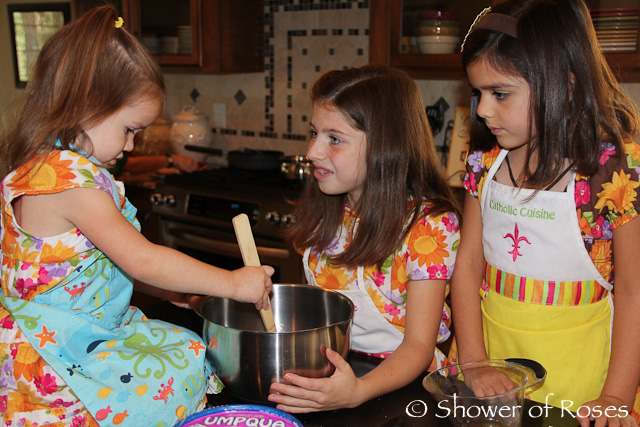
State-by-State Baking :: Mississippi Mud Pie
flowing through our land.
The mighty Mississippi River
is awesome, strong, and grand.”

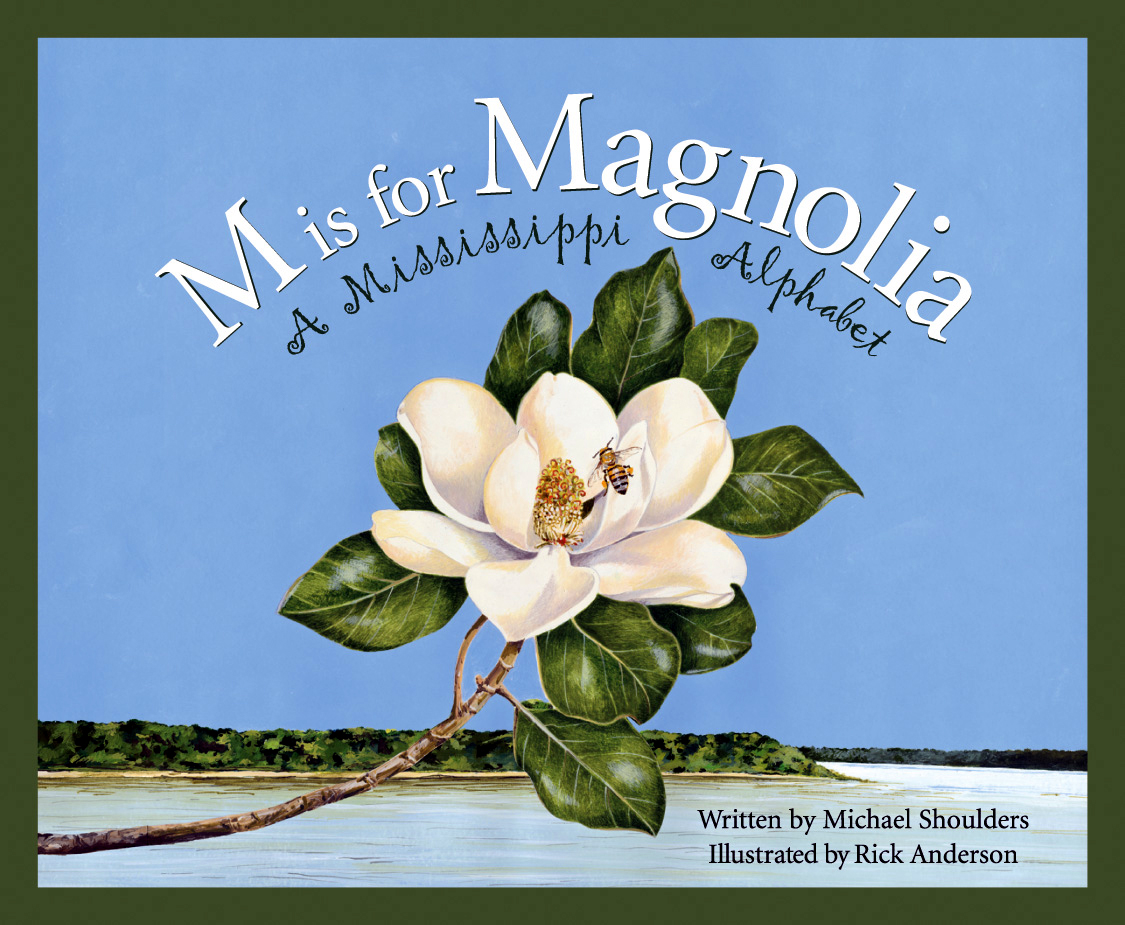
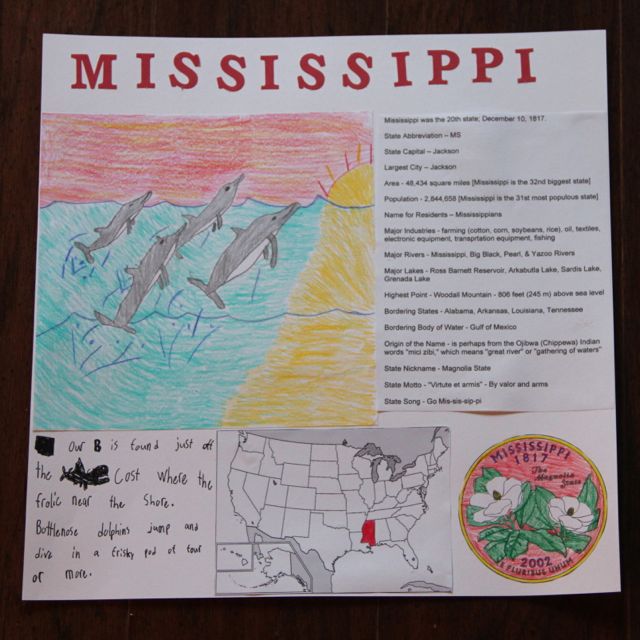
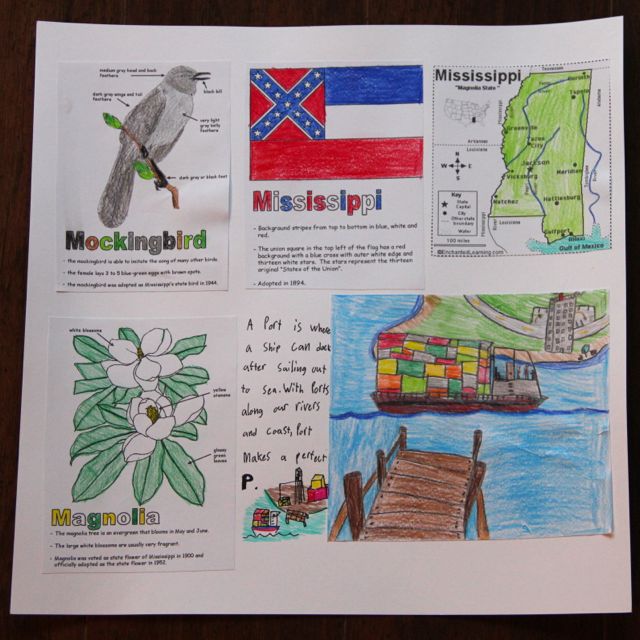
It’s been months since the girls studied Mississippi (sometime last fall) but I am just now getting around to adding it here. Anyhow, for the state of Mississippi, the 20th State to join the Union, the girls read M is for Magnolia: A Mississippi Alphabet and then completed their Notebook Pages.

- 1 quart coffee ice cream (we used Almond Mocha Fudge)
- 1/3 cup butter
- 1 1/2 cups finely crushed chocolate wafers (we used chocolate graham crackers)
- 1 1/2 cups fudge sauce, refrigerated
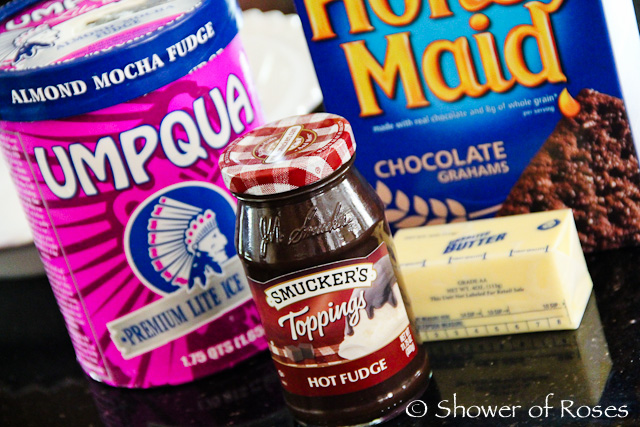
Let the coffee ice cream soften at room temperature for 30 minutes.
Melt the butter over low heat.
Let the butter cool for a minute, while you crush the wafers (graham crackers).

Pour the melted butter it into a mixing bowl and add the crushed wafers.
Mix well.
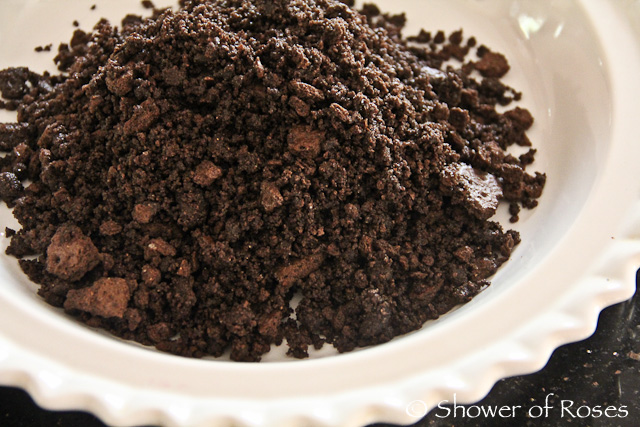

Press the chocolate wafer mixture into the bottom and up the sides of a pie plate.

Fill the pie shell with the softened ice cream.

Smooth the top of the ice cream evenly with a knife or a spatula.

Put the pie into the freezer until the ice cream is firm, about 20 minutes.
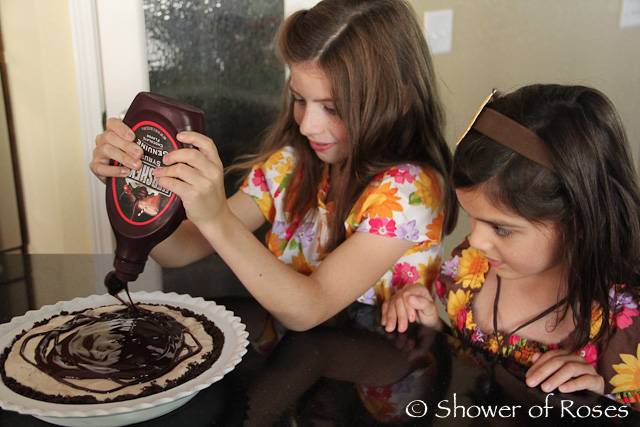
Top with the fudge sauce…
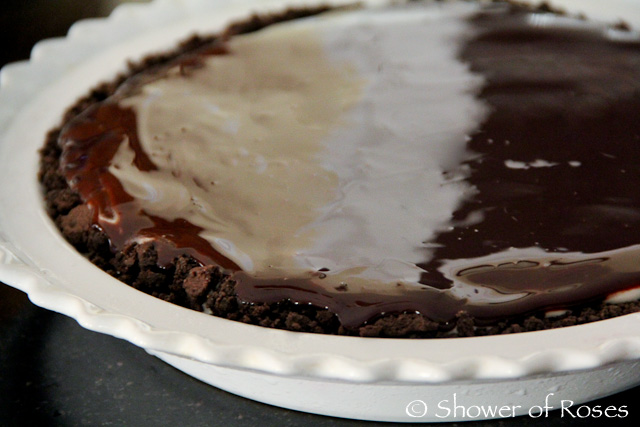
…and spread with a spatula.

Slice and serve.
State-by-State Scrapbook :: Mississippi
Our people, waters, and fertile land
make Mississippi great.“
.: Mississippi by Captain :.
.: Mississippi by Rascal :.

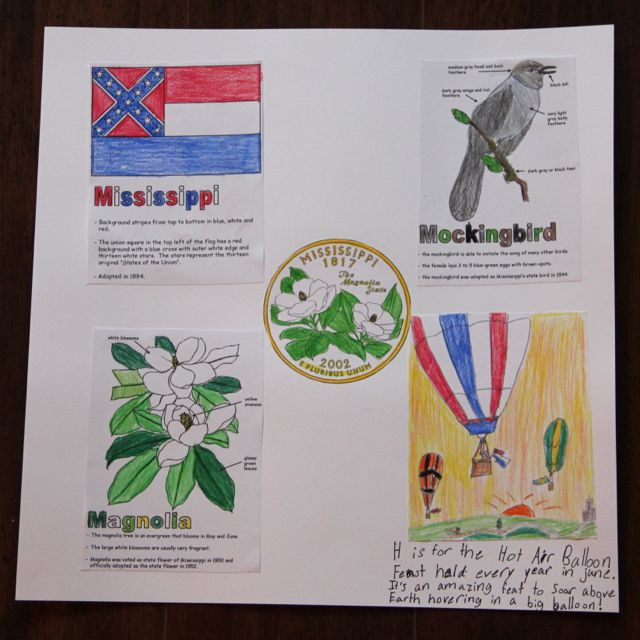
*The links to the worksheets used for these notebook pages can be found here, and here is the link to all of our State-by-State Study posts.
+Sparkle

Those of you who have been visiting my blog since the very early days might remember back in 2008 when we bought goldfish for the four oldest (which were their very first pets), named the goldfish, mourned the loss of Mr. Peter Nemo, quickly followed by the loss of Princess and Flower. Rascal’s fish Sparkle, however, lived a very long life which came to an end this afternoon… Yes, today was another sad day, especially for Rascal, when he discovered that his fish had died! The boys have planned the burial for tomorrow. In the meantime Rascal added Sparkle to his timeline to remember forever… I sure love these sweet, sentimental children of ours!
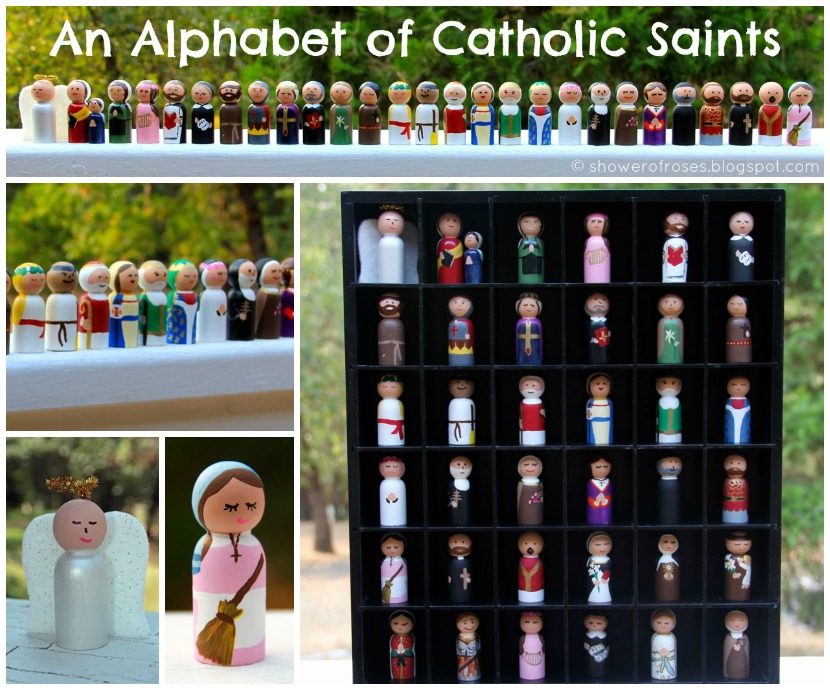
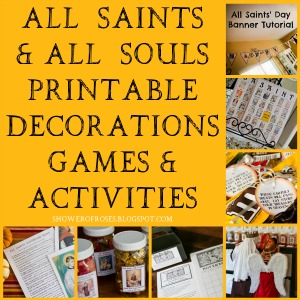
All Saints’ Day Banner Tutorial {including Printable!}

Since I just finished sharing the Alphabet Blocks that I made using the Saint Letters from Catholic Artworks, I thought now would be a good time to go back and share the tutorial for our All Saints’ Day Banner!
Last year, for our annual All Hallows’ Eve/All Saints’ Day Party, I created this banner using the images from the Catholic Artworks book An Alphabet of Catholic Saints. The clip art I used was on a CD of mine that they no longer sell, but I’ve been told that all the images are all included (with much more) on their current Teach Me to Discover the Saints CD. (Catholic Artworks is the publisher, but for those of you that are hesitant to purchase from them this CD is also available from Sacred Heart Books and Gifts.)
I did call George Nippert, the owner at Catholic Artworks, and was granted his permission to share my document with you all, which includes some of their (copyrighted) Saint Letters resized to the correct size needed for this banner! (Thank you Catholic Artworks)
Note: Since these images are copyrighted, the document I share can not be modified in any way and is to be used exclusively to create this particular banner. It is also not to be used for profit. Also, if you share this post, be sure to link directly to this blog post, and not to the document on Scribd. Thank you!

Supplies:
- Letter/Saint Images Printed on White Paper
- 11 pieces of Colored Cardstock (I used black)
- Paper Cutter and/or Scissors
- Glue Stick
- Small 1/8″ Hole Punch
- Ribbon

1. Print the All Saints Letter Banner Pages on white paper.
2. Cut out each banner letter, using the line as a guide.
3. Glue the letters to the card stock. (As you can see in the picture, I was able to fit two on each piece of 8.5×11″ cardstock.
4. Leaving a border of card stock, trim around each banner letter using a paper cutter.
5. Using a small hole punch, punch a hole in the top two corners of each banner letter.
6. Tread ribbon (I used white) through the holes in the banner to hang.

Our New Archbishop!
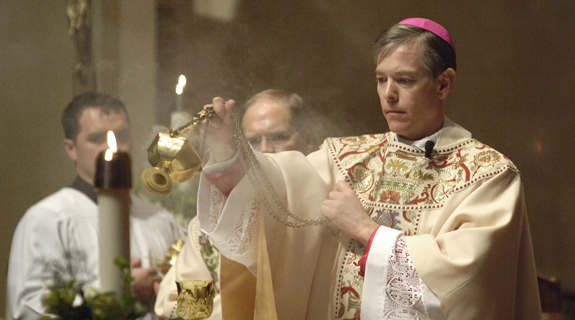
Vatican City, 29 January 2013 (VIS) – Today, the Holy Father appointed Bishop Alexander King Sample as archbishop of the archdiocese of Portland (area 76,937, population 3,296,705, Catholics 412,725, priests 300, permanent deacons 72, religious 653), Oregon, USA. Bishop Sample, previously bishop of Marquette, Michigan, USA, was born in Kalispell, Montana, USA, in 1960, was ordained to the priesthood in 1990, and received episcopal ordination in 2006. In the national bishops’ conference he currently serves on the Subcommittees on Native American Catholics and on the Catechism. He is also vice-postulator for the cause for canonisation of Venerable Frederic Baraga, first bishop of the Diocese of Marquette. He succeeds Archbishop John George Vlazny, whose resignation from the pastoral care of the same archdiocese the Holy Father accepted, upon having reached the age limit.
We are so excited to welcome our new Archbishop and couldn’t be happier to hear this wonderful news today! We were even more pleased to see that he is supportive of the Extraordinary Form and is known to celebrate it regularly! What an incredible blessing for our diocese!
New Archbishop of Portland in Oregon! (Unam Ecclesiam)


0 Comments