")
Please Pray for Charlotte and Cupcake!
Charlotte is so good about praying for all of us and passing along prayer requests. Now it is time for us to storm heaven for Charlotte and baby Cupcake!
I just got off the phone with Charlotte and she is in the hospital right now, due to continued stomach cramping which is being caused by high blood pressure. Her doctor has decided that Cupcake needs to be born today, and will either be inducing labor soon, or preforming a c-section. Please pray for Charlotte, the baby, her family, and for the doctors. Thank you!
UPDATE: Thank you all for your prayers! Cupcake arrived safely via c-section yesterday morning, September 2nd! Congratulations to Charlotte and family!! We can’t wait to meet your precious new daughter!
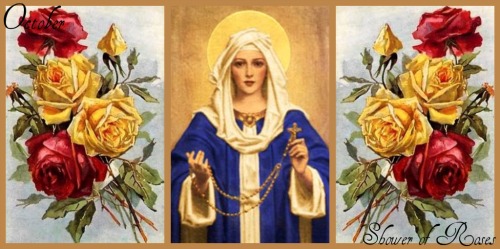
Links for October :: Month Dedicated to the Most Holy Rosary
October 1st (New) and 3rd (Trad) ~ St. Thérèse of Lisieux:
- A Novena to St. Thérèse beginning on her Feast Day
- Nine Day Novena in honor of St. Therese
- Novena to St. Therese
- A Morning Prayer Written by Saint Therese (2015)
Compilation posts of Ideas for celebrating this beautiful feast:
- Plans for the Feast of St. Thérèse (2008)
- Ideas for Celebrating the Feast of St. Thérèse (2010)
- Commemorating the Canonization of the Parents of Saint Thérèse, Saints Louis and Zélie Martin (2015)
Past Celebrations in honor of St. Therese:
- Little Flowers for St. Thérèse (2007)
- A Shower of Roses (2008)
- Roses for St. Thérèse (2008 – Summer with the Saints)
- Celebrating the Feast of St. Thérèse ~ 2009
- Highlights from “T” Week (2010 – Alphabet Path)
- Celebrating the Saints on First Fridays (Feast of St. Thérèse 2010)
- A few more pictures from the Feast of St. Thérèse (2010)
- Celebrating the Feast of St. Therese (2011 – Tea Party)
- My Daybook :: On the Traditional Feast of St. Therese (2011)
- B is for Buttercream :: Happy Feast of St. Therese (2012 – Buttercream Rose Cupcakes)
- My Daybook :: On the Traditional Feast of St. Therese (2012)
- In Honor of the Feast of St. Therese :: Apple Roses, A Novena & Another Giveaway! (2013)
- On the Traditional Feast of the Little Flower (2013)
- The Catholic Child and the Saints :: The Little Flower (2014)
- Rose Cupcakes for St. Therese (2014)
- On the Traditional Feast of Saint Thérèse (2015)
- Roses from St. Therese {and we bought a house!} (2018)
- Morning Prayer by St. Thérèse (2020)
- Baking Éclairs on the Feast of St. Thérèse (2020)
Specific crafts/projects in honor of St. Therese:
- Chocolate Roses for St. Thérèse
- Getting Ready… (Rose Cupcakes)
- St. Thérèse Lap Books: Twinkle Toes and Chiquita
- St. Thérèse and Her Family Paper Dolls
- St. Thérèse Sacrifice Beads
- Printable Activity Sheets in Honor of St. Therese and Updated Post
- Little Flowers Bingo: Flowers and Gems
- Lisieux for You (Nail Polish)
- Free Printable St. Thérèse Worksheets (2015)
- The Little Flower :: DIY St. Therese Infant Costume
October 2nd ~ Holy Guardian Angels (New, Trad.):
- A Special Day.. for more than one reason! (2007)
- Plans for the Feast of the Holy Guardian Angels (2008)
- Little Saints Pre-School :: Colors/Guardian Angels (2011)
- Angel of God, My Guardian Dear (2013)
- 15 Years Ago on the Feast of the Holy Guardian Angels (2014)
- Sweet Sixteen (2015)
- A is for Angel: The Alphabet in Sacred Art (2020)
- Angel of God, My Guardian Dear (2020)
- Little Saints Preschool: Colors & Guardian Angels (2022)
October 4th ~ St. Francis of Assisi (New, Trad.):
- Feast of St. Francis of Assisi
- Wolf Paw Cookies
- In Honor of St. Francis of Assisi (Summer with the Saints 2009)
- Highlights from “F” Week (Alphabet Path – 2009)
- On the Feast of St. Francis of Assisi (2010)
- Francis Woke Up Early… (2011)
- Celebrating the Saints :: St. Francis of Assisi (2013)
- Saint Francis and the Wolf (2018)
- St. Francis of Assisi’s Sermon to the Birds (2019)
- Early October Daybook (2022)
October 5th ~ St. Faustina (New):
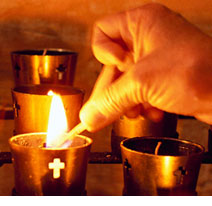
October 7th ~ Our Lady of the Rosary (New, Trad.):
- In Honor of the Most Holy Rosary (2008 – Coloring Pages, Craft and Snack)
- On the Feast of Our Lady of the Rosary (2009 – Snacks and Coloring Pages)
- On the Feast of Our Lady of the Rosary (2010 – White & Blue Candy Flowers)
- Our Lady’s Rosary (2017 – Rosary Making)
- Commemorating the 100th Anniversary of Our Lady of Fatima and the Miracle of the Sun (2017)
October 12th ~ Columbus Day:
- Happy Columbus Day!
- Columbus Day 2008
- Columbus Day (2008 – List of plans and suggestions)
- My Daybook: October 19, 2009 (2009 – Baked Potato Boats)
- Fall Baking :: Pumpkin Thumbprint Cookies
- Stargazing and Spanish Cocoa on Columbus Day… (2010)
- Chocolate Caliente on Columbus Day (2011)
- Columbus Day Craft :: New World Map (2015)
October 15th ~ St. Teresa of Avila (New, Trad.):
- Plans for the Feast of St. Teresa of Avila
- “Wisdom of the Saints” Journal
- St. Teresa of Avila Little Flowers Meeting
October 18th ~ St. Luke (New, Trad.):
October 25 ~ St. Crispin:
- “Upon St. Crispin’s Day” (2010)
October 27th ~ St. Telka
October 31st ~ All Hallows’ Eve
Our Annual Saint-O-Lanterns:
- Reminiscing (pictures from 2006)
- Saint-O-Lanterns (2007)
- We have a winner, or THREE! (2007)
- Another Saint-O-Lantern (2008)
- Ascension-O-Lantern
- Carving our Saint-O-Lanterns ~ 2009 Edition
- Carving our Saint-O-Lanterns (2010)
- Happy All Hallows’ Eve! (2010 – Saint-O-Lanterns)
- Carving our Saint-O-Lanterns (2011 – Patron Saint Symbols)
- Happy All Hallows’ Eve (2011 – Saint-O-Lanterns at night)
- Carving our Saint-O-Lanterns (2012)
- Happy All Hallows’ Eve (2012 – Saint-O-Lanterns at night)
- Carving our 2014 Saint-O-Lanters (2014)
- Happy All Hallows’ Eve (2014 – Saint-O-Lanterns at night)
- Carving Our 2017 Saint-O-Lanterns
- Saint-O-Lanterns (2017)
- Carving Our 2019 Saint-O-Lanterns
- Saint-O-Lanterns (2019)
- Saint-O-Lanterns (2020)
- Saint-O-Lanterns (2021)
- On the Feast of St. Hubert (2022)
- Saint-O-Lanterns (2022)
Saintly Costumes:
- Saintly Costumes (lots of ideas and suggestions!)
- Reminiscing (pictures from 2006)
- Our Cast of Saints (2007)
- Our Cast of Saints ~ 2008
- A Costume for St. Maximilian Kolbe (2009)
- Our Cast of Saints (2009)
- Getting Ready to Celebrate the Feast of All Saints (2010 – includes costumes from older years)
- Almost) Wordless Wednesday (2010 – Our Lady of Guadalupe)
- Our Cast of Saints (2010)
- A Costume for St. Catherine of Alexandria (2011)
- Our Cast of Saints (2011)
- Oktoberfest/Costume Party (2012 – not a saint theme)
- {this moment} (2012)
- Our Parish All Saints’ Party and Costume Contest (2012)
- Our Cast of Saints (2012)
- St. Michael the Archangel (2012)
- St. Joan of Arc, Maid of Lorraine :: All Saints’ Day Costume (2012)
- Celebrating the Saints: Our 2013 Costumes
- Celebrating the Saints: Our 2014 Costumes
- Celebrating the Saints : Our 2015 Costumes
- Celebrating the Saints :: Our 2016 Costumes
- Celebrating the Saints :: Our 2017 Costumes
- Celebrating the Saints :: Our 2019 Costumes
- Celebrating the Saints :: Our 2020 Costumes
- Celebrating the Saints :: Our 2021 Costumes
- Crafting a Crown Fit for a Queen (2022)
- Celebrating the Saints :: Our 2022 Costumes
Saintly Games:
- Saintly Games
- Getting Ready to Celebrate the Feast of All Saints (2010)
- St. Martha’s Cake Walk (2010)
- All Saints Bingo :: A 30 Card Printable Bingo Set (2011)
- All Saints’ Day Party Games :: A Saintly Jigsaw Puzzle Race (2012)
- All Saints Scavenger Hunt {A Printable Party Game} (2012)
- All Saints’ Day Party Games :: Saint Themed Guessing Jars (2013)
- 12 More Saint Themed Guessing Jars (2014)
- All Saints Scavenger Hunt {Another Printable Party Game Featuring 16 Additional Saints & New Clues!} (2014)
- All Saints Party Printables (2015)
- All Saints Scavenger Hunt {Third Edition} (2016)
- All Saints Guessing Jars {18 More Saints!} (2016)
- All Saints Guessing Jars {Trader Joe’s Edition} (2017)
- All Saints Guessing Jars {8 More Saints!} (2019)
- All Saints Guessing Jars {Dye-Free Edition} (2019)
- All Saints Guessing Jars {Printable Guess Pages} (2019)
- All Saints Guessing Jars (2020)
- All Saints Guessing Jars {2021 Edition}
Decorations:
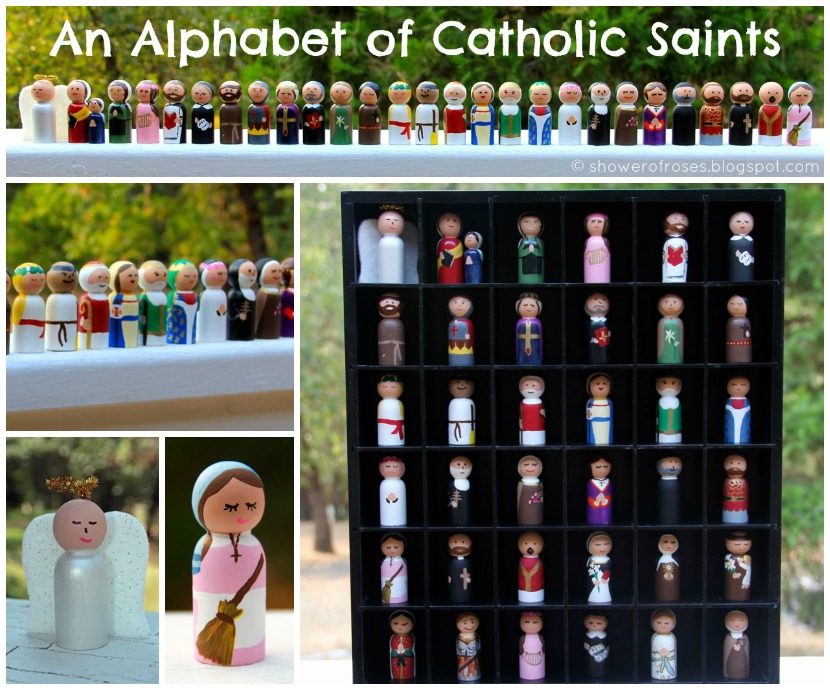
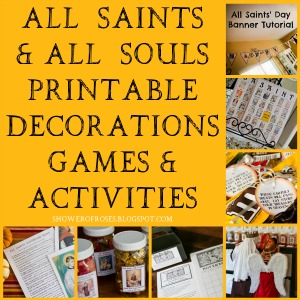
- All Saints’ Day Banner Tutorial {including Printable!} (2012)
- An Alphabet of Saints :: B is for Blocks (2012)
- An Alphabet of Saints :: Painted Wooden Peg Dolls
Fasting and Feasting:
- Fasting and Feasting for All Hallows’ Eve, All Saints’ Day and All Souls Day
- Making Cookies (2008) and Holy Ghost Cookies (2009)
- Candy Math (2009)
Past All Hallows’ Eve and All Saints’ Parties:
- All Saints’ Party (2008)
- All Hallows’ Eve (2009)
- A Few More Pictures… (from our 2010 All Saints Party)
- Sanctifying Halloween :: Celebrating the Saints (2011 Party – Hosted at Home!)
- {pretty, happy, funny, real} (2012)
- Celebrating the Saints :: Our Annual All Hallows’ Eve Party (2012)
- Celebrating the Saints :: Our Annual All Hallows’ Eve Party (2013)
- Celebrating the Saints :: Our Annual All Hallows’ Eve Party {2014 Edition}
- All Hallows’ Eve Party at St. Joan of Arc Parish (2019)
- St. Joan of Arc’s Annual All Saints Party (2020)
- St. Joan of Arc’s 2021 All Saints Party (2021)
OTHER RESOURCES:
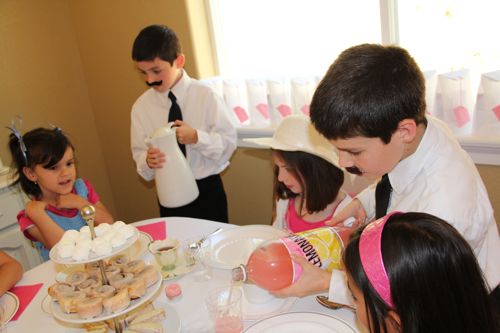
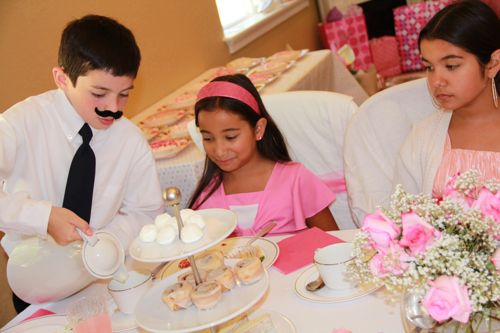
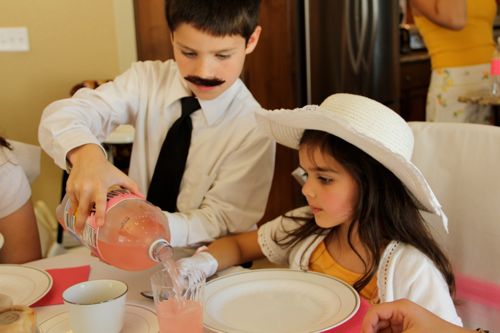
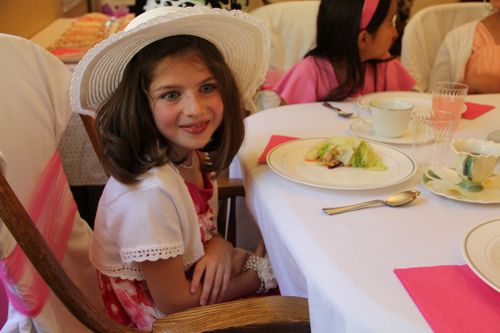
ParTEA Time :: A Tea Themed Birthday!
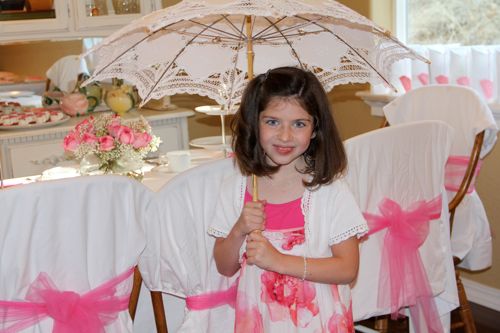
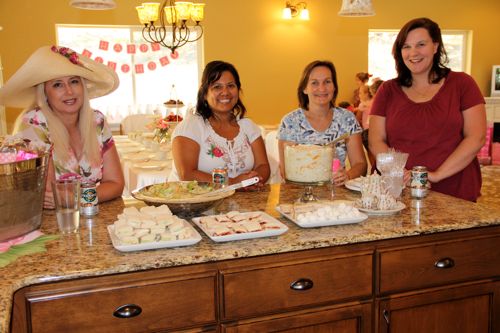
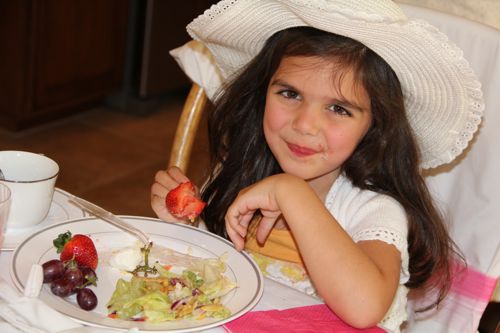
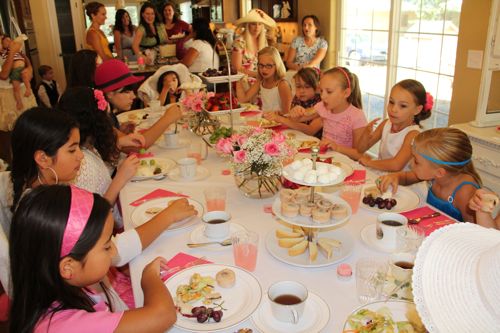
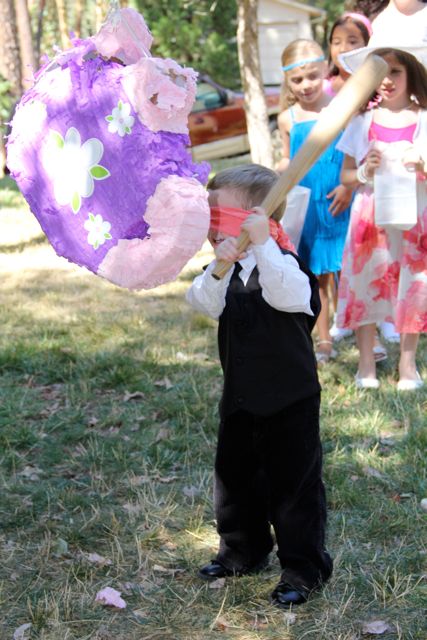
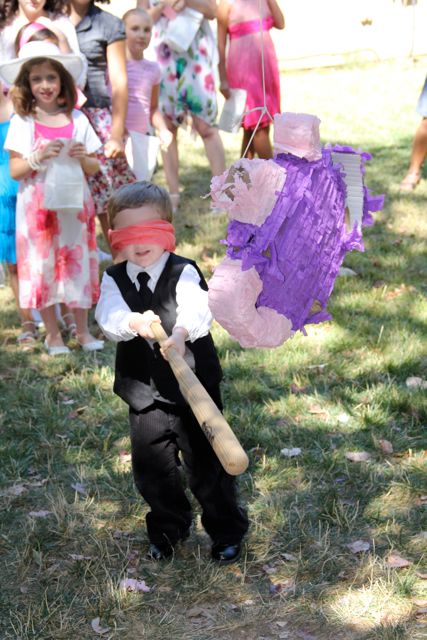
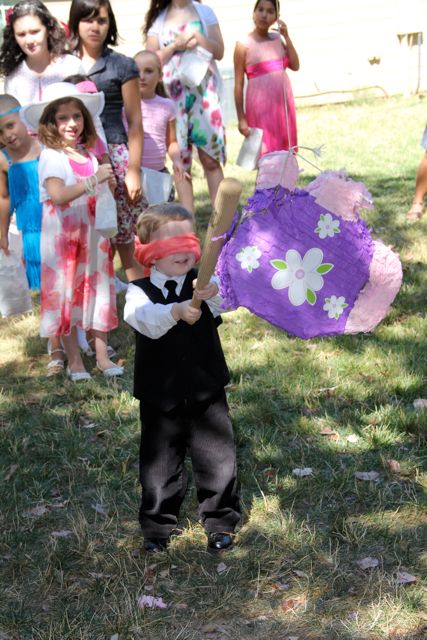
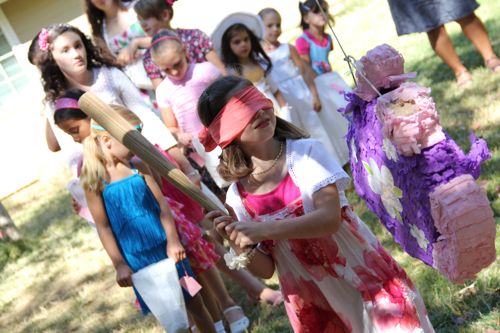
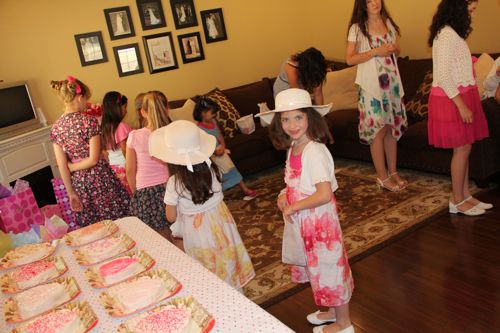
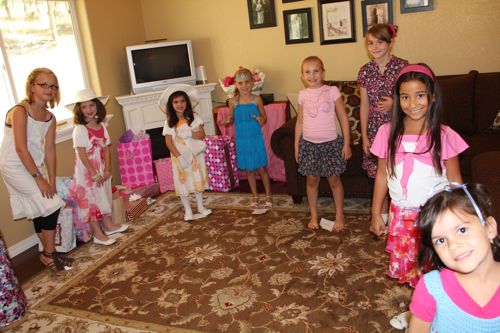
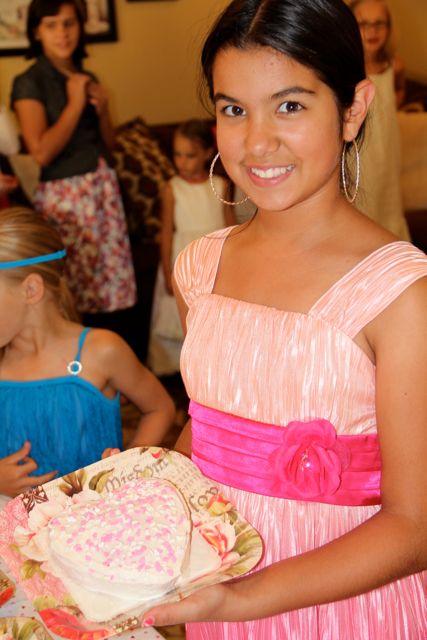
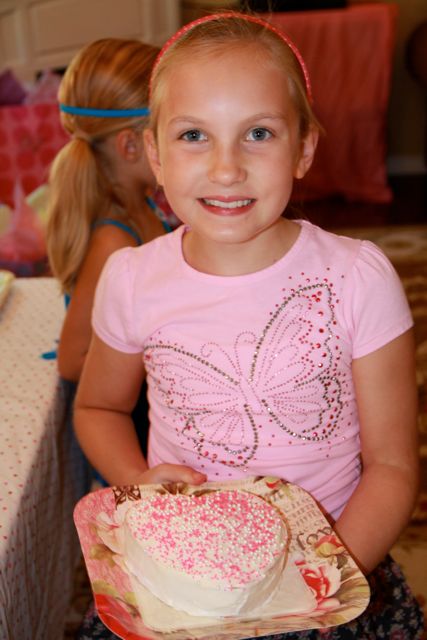
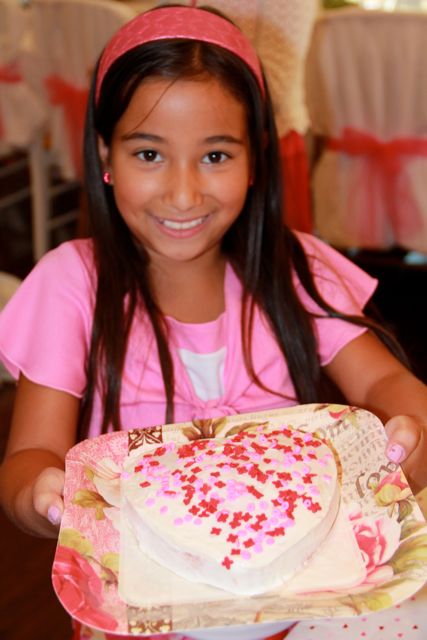
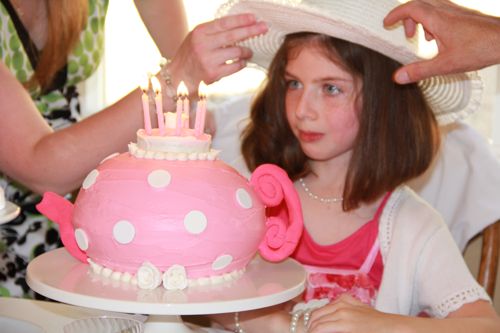
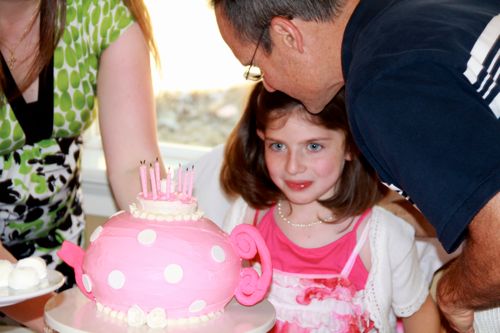
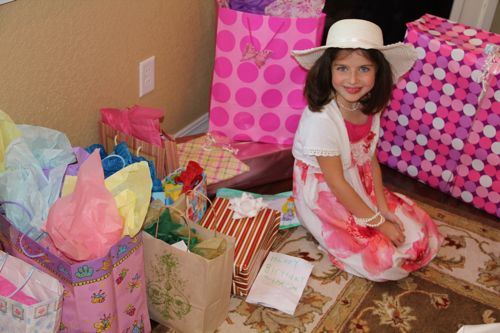
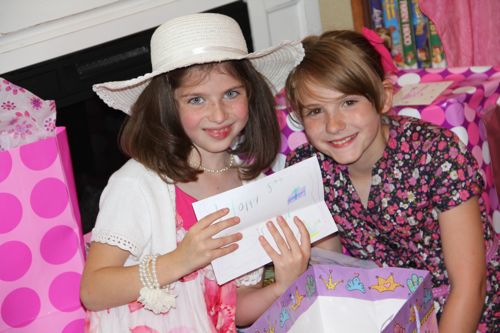
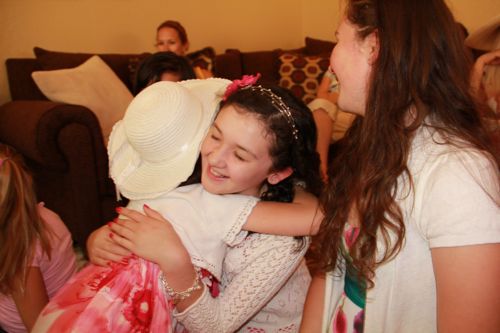
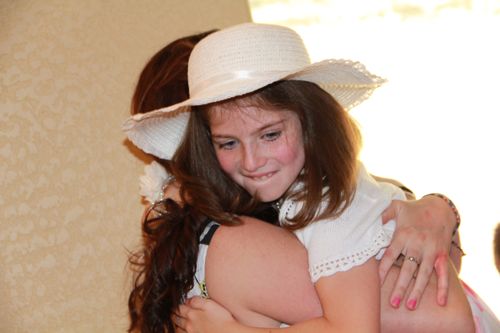
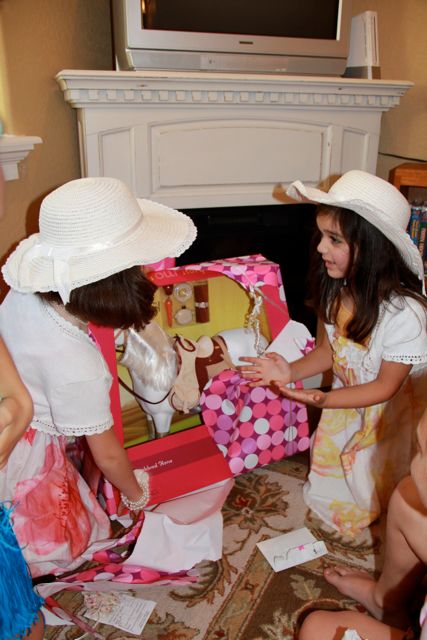
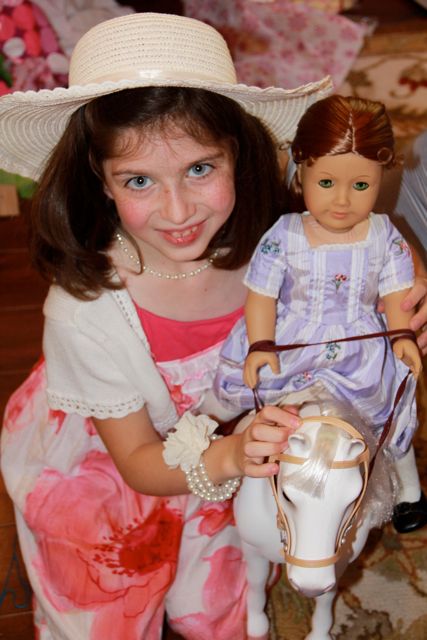
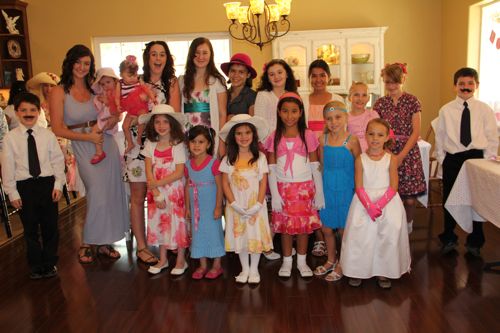
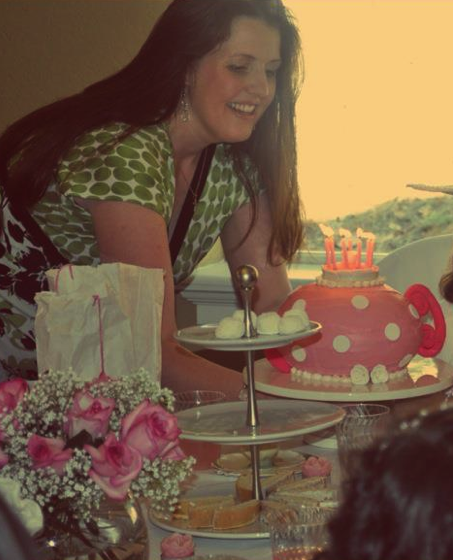
Our little Twinkle Toes turned 8 years old yesterday and so it was ParTEA time! Since our children generally just have one big “friends” birthday party (the rest are just with family), this was the one for Twinkle Toes. Originally we were going to do it last year, when she turned 7, but since her Daddy was on a fire assignment, and since we were remodeling and didn’t have a kitchen at the time, and since I happened to be hobbling around on crutches, we decided to wait until this year. Of course I over planned as usual, and I wasn’t able to get to everything on my list, but I had so much fun planning her special day!

The inside of the card had all the information, and at the bottom it read:
Please dress up in your favorite teatime dress.
Hats and gloves are optional.


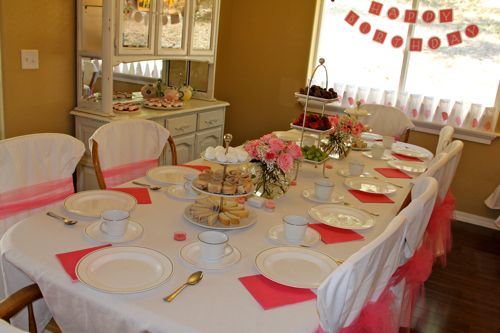
To brighten up the room, and disguise the fact that all the chairs didn’t match, I used a nice big white tablecloth to cover the table and then hung white king sized pillow cases, crib sheets, and whatever other white fabric I could find laying around the house over the back of each chair. I then tied big pink tulle bows around the back of each to secure the fabric in place. It looked so pretty!

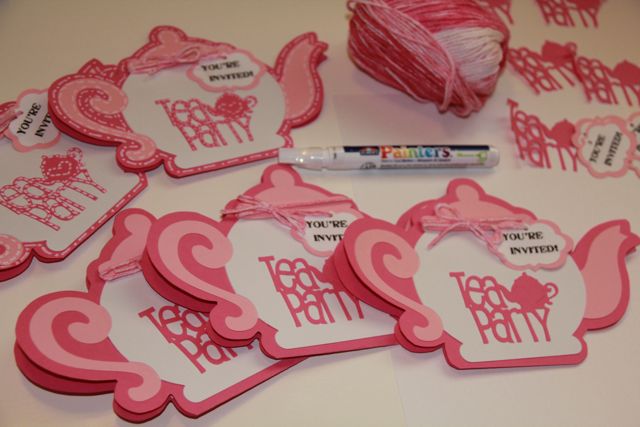
Next I created a banner to hang in the window using my Cricut with the George
(Font) and Winter Woodland
(Shapes) Cartridges, punching two small holes in the top of each card and stringing them all together with some light pink ribbon.
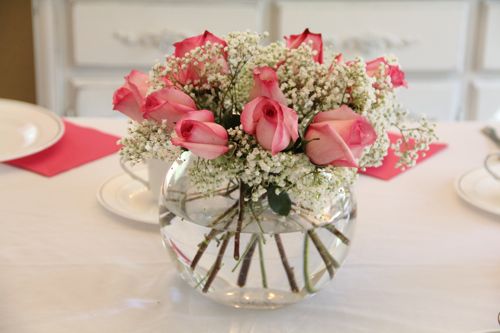
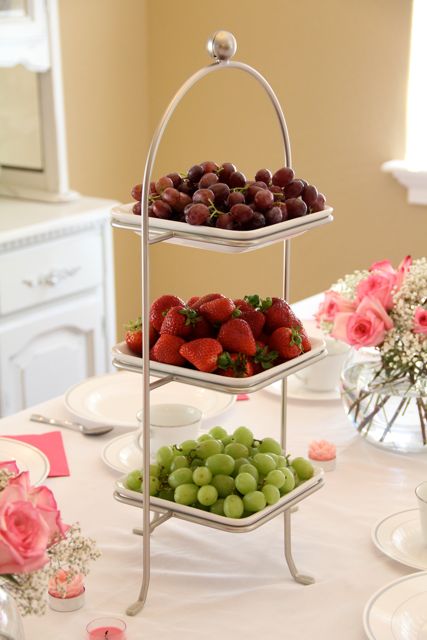
For centerpieces I picked up a couple dozen pink roses (from Costco) and some Babys Breath (from Safeway) to place in a couple fishbowl style vases on the table. I bought the Roses over the weekend, so (with a vacation coming up) we’d be able to enjoy them for as long as possible. They make me smile every time I walk into the dining room!
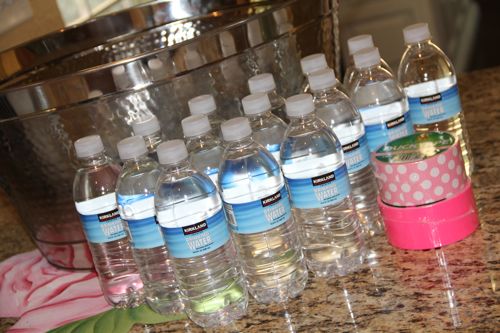

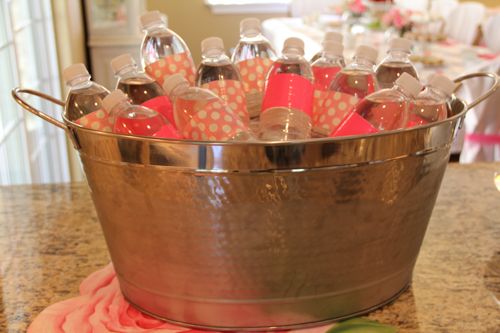
Oh!! After seeing this idea recently on Pinterest, I had to pick up some pink Duct Tape for our water bottles. Isn’t this the greatest idea?! Unlike printed water bottle labels from your computer, these bottles of water wrapped with a strip of Duck Brand duct tape can go right in the ice tub looking pretty, without any ink bleeding!
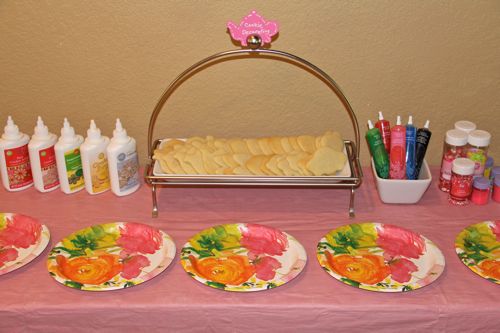
I had pre-baked the cookies using a couple different sets of cookies cutters (Fox Run’s Tea Party Cookie Cutter Set and Wilton’s Tea Party 3 Piece Cookie Cutter Set
) along with lots of icing and sprinkles.
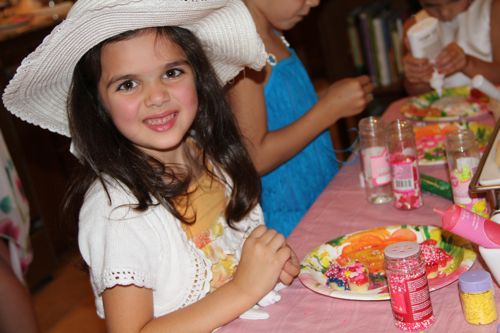


I also had a little jar filled with Candies for the girls to try and “Guess How Many!” I made my own little entry sheets with a cute tea pot font. Any guesses on how many you think are in that jar? Most of the girls were way off, but my sister Julianna and niece Layla (her smart momma must have helped her) tied for the closest – just 8 off!


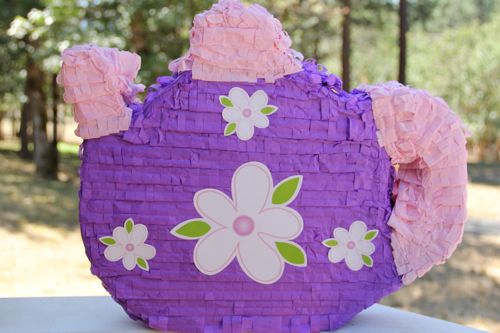
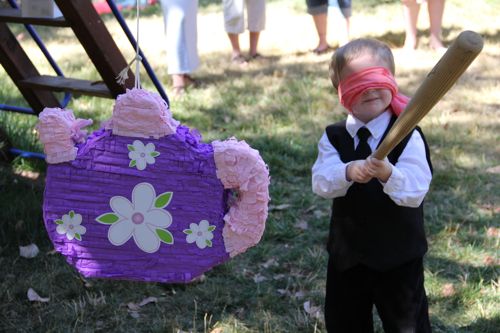
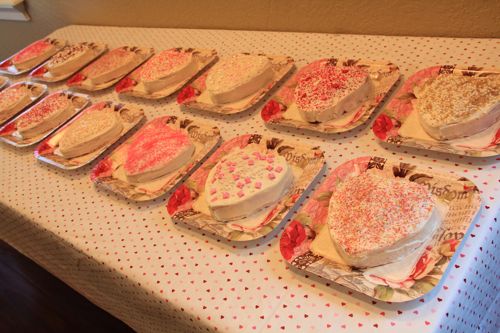
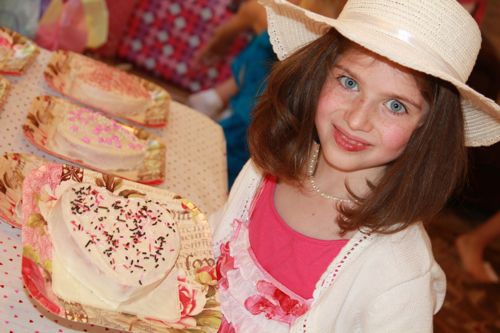
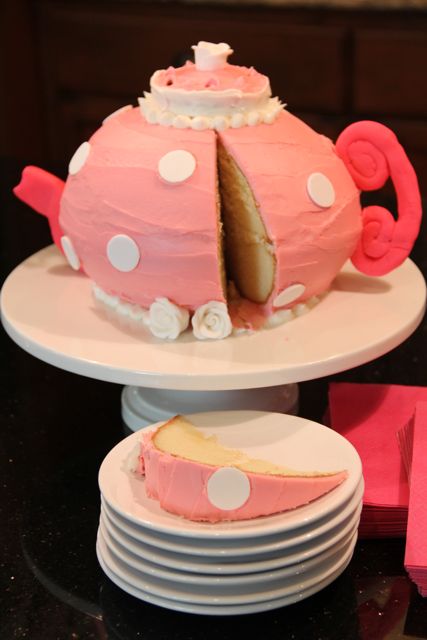
I placed numbered squares in a circle on the floor. Each time, when the music stopped, I drew and called out a number. Whoever was standing on that numbered, picked it up and brought it to me before choosing the cake they wanted to take home.
It was such a fun game, and so worth the time it took to bake, frost, and decorate ALL those cakes!


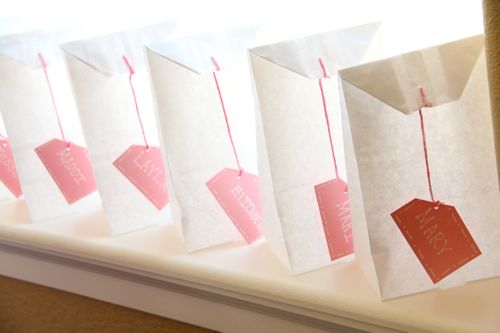
For Treat Bags, I used a cute and easy idea from Family Fun, turning white lunch bags into Giant Tea Bags! Instead of stapling the string to the bag and tag, I punches a couple small holes, tying them together. Inside each bag the girls found one of the following sticker books: Tea Time Stickers, Glitter Roses Stickers, or Old-Fashioned Roses Stickers. They then were able to use their bags for all of the pinata candy!
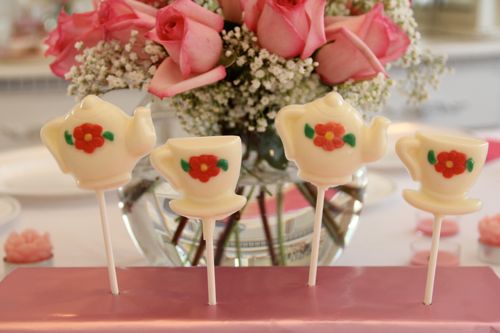
Using White, Red/Pink and Green Candy Melts and this great little Tea Pot and Tea Cup Sucker Chocolate Mold, I had planned to make each girl a lollipop or two, as one last party favor, but I ran out of time after making just four. Oh well! They made a pretty decoration and nice little treat for the boys.
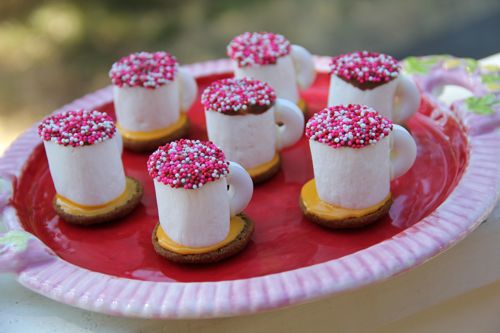
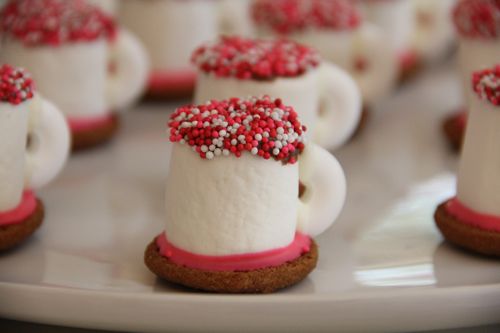
Marshmallow Teacup Cookies
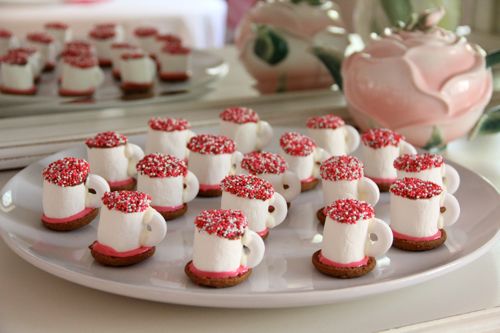
I am making myself take a break from housework, packing, and planning to sit down for a few minutes, so I thought I would share another recipe from the birthday party yesterday. I found this idea through a google search, and I think it might have originated (at least online) here. I modified the recipe to be able to use ingredients I already had on hand. The girls and I had so much fun and they were so fast and easy to make!
Ingredients:
Round Cookies – We used Trader Joe’s Triple Gingersnaps
1 Package Marshmallows
Sprinkles
Lifesavers
Cookie Icing
Cocoa and White Candy Melts
Directions:
Dip the top of each marshmallow into some melted Cocoa Candy Melts and then into the sprinkles.
Cut all lifesavers in half. Dip the ends of each lifesaver half into melted White Candy Melts and attach one lifesaver “handle” to the side of each Marshmallow. Hold for a second or two to make sure it adheres to the marshmallow.
Cover the bottom/flattest side of each cookie with a little bit of cookie icing. (We used Trader Joe’s Triple Gingersnap Cookies. I had purchased a box of Vanilla Wafers, but they were too rounded on the top and kept tipping over. Ours were a little too small, but they worked… A slightly larger sugar cookie, that is mostly flat on the top would have been perfect.)
Place a marshmallow teacup in the middle of each cookie, pressing down lightly.
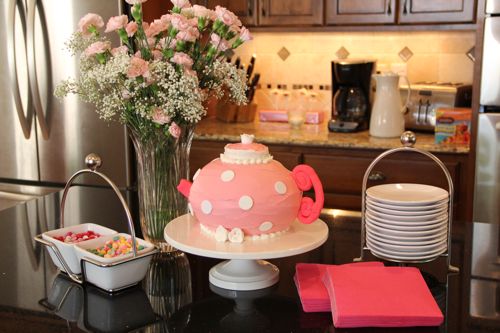
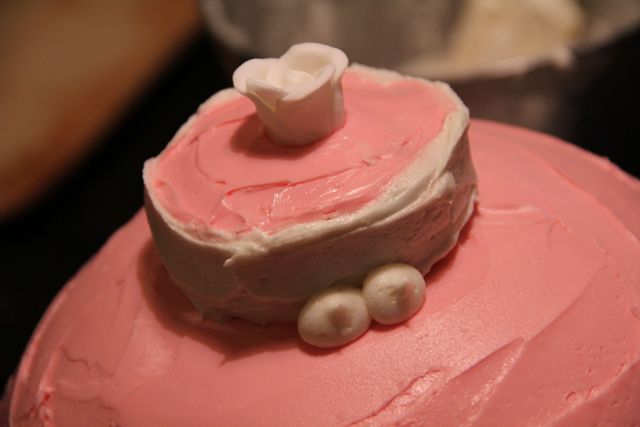
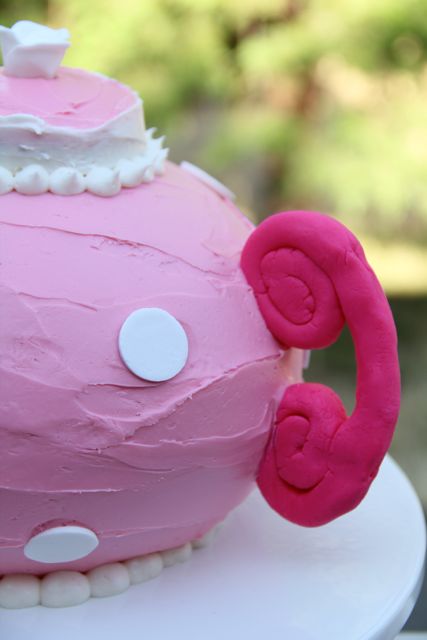
A Pretty Pink Tea Pot Cake Tutorial

Supplies:
2 Boxes of Cake Mix – I used White Cake Mix, without the pudding in the mix
2 cans of Strawberry Frosting
White Frosting – I used the same recipe from the Castle Cake
1 package of Neon Pink Fondant
3 wooden skewers and 4 toothpicks
1 package of Necco Wafer Candies
3 White Icing Roses – since I happened to have three in the cupboard
Soccer Ball Cake Pan
Using the Soccer Ball Cake Pan, I baked the two halves of the cake. (I actually made the cakes on Saturday, and stuck them in the freezer until Monday when I decorated them. I usually put the cakes in the freezer for 20 minutes or so before frosting, but frosting this cake completely frozen was the easiest ever. In fact, I don’t think I spent more than 20-30 minutes decorating, from start to finish.) Each half of the cake is made from one boxed mix. I followed the directions on the cake pan, and it took about 45 minutes to bake each half of the cake.
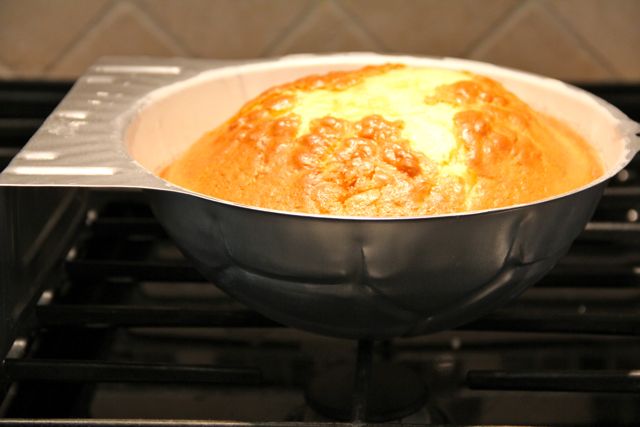
At this point, I was really worried about how on earth I was going to be able to turn these cakes into a tea pot! I cooled the cakes in the pan for about 10 minutes. Then, after taking them out, I trimmed the top off to create a flat surface, flipping them over to their now flat side to cool completely. I saved the trimmed top of the cake to use for the lid of the tea pot.
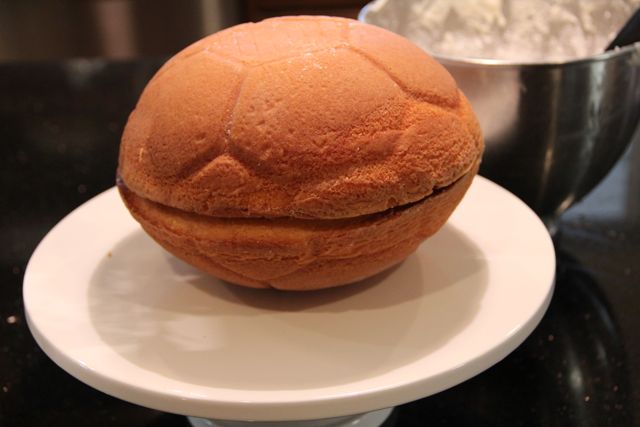
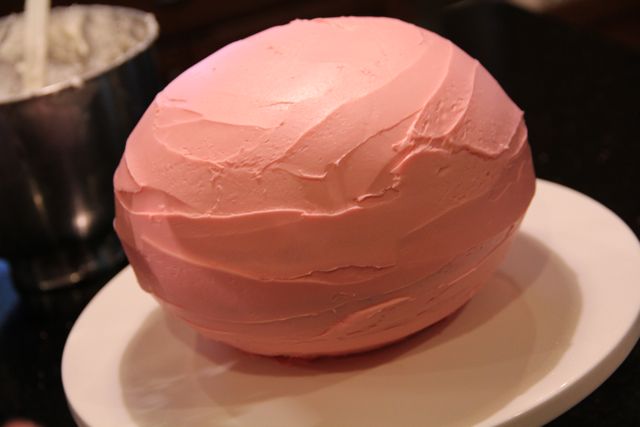
Here is what the cake looked like, just before decorating. I started with the bottom layer, holding the flat side on one hand and frosting with the other. This was so much easier than trying to frost it on the cake platter, plus I was able to add a thin layer of frosting to the very bottom of the cake which secured it to the platter after it was refrigerated.
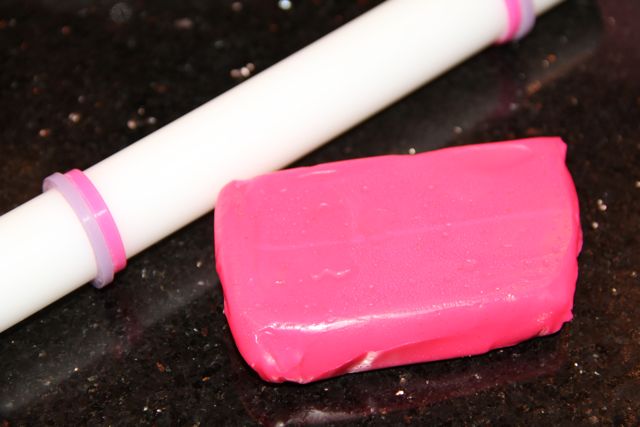
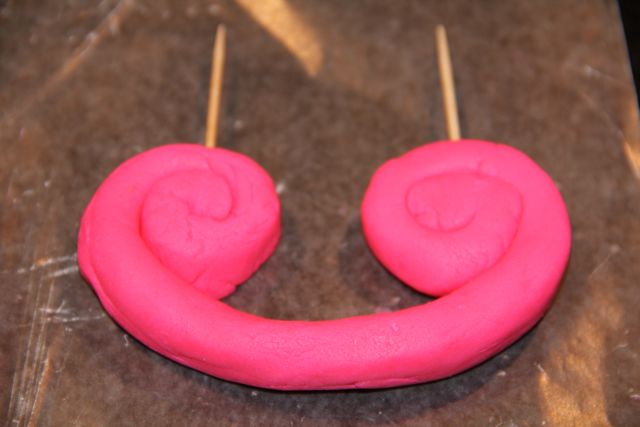

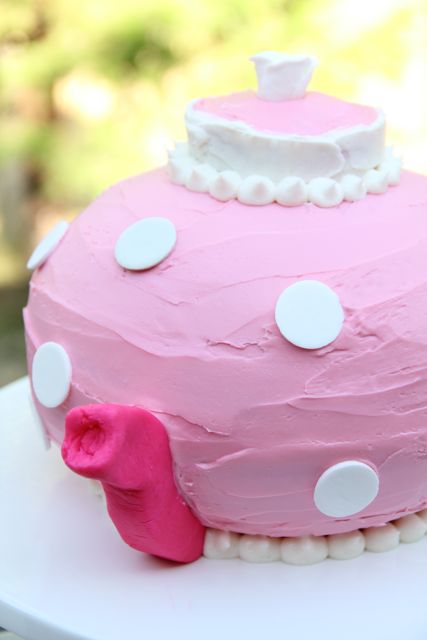
Tip: I probably should have made the handle and spout at the same time that I baked the cakes, allowing them to dry. When the fondant is fresh and moist, it is very easy to mold, but when allowed to dry it becomes hard and won’t fall apart or lose it’s shape.
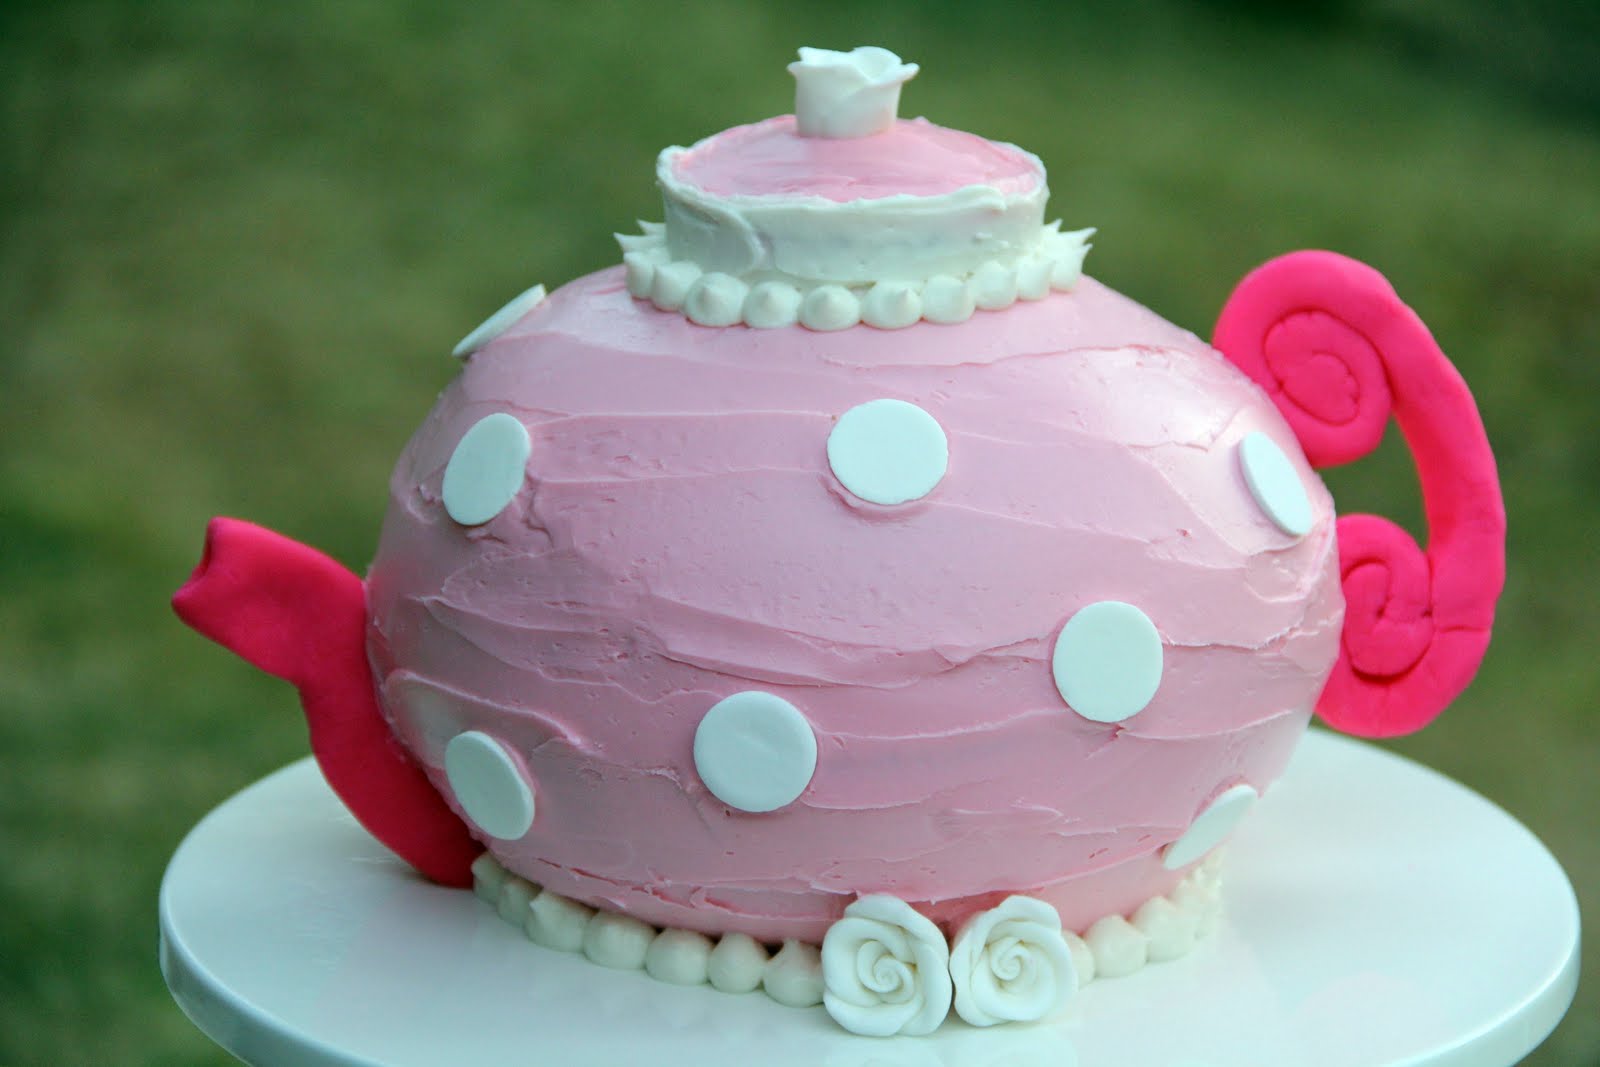
To complete the cake I used some white Necco Wafers (another thing that I just happened to have in my box of decorating supplies) and added “pearls” of white icing using a round icing tip to the base and the bottom of the lid.
I have so many pictures that I am dying to share with you all, but I will have to come back to that later. Hope you are all having a great day!
Happy 8th, Birthday Girl!

Back-to-School Schultütes
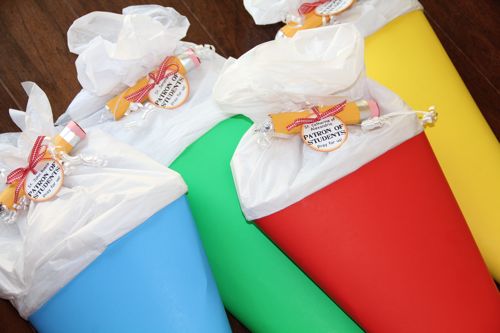
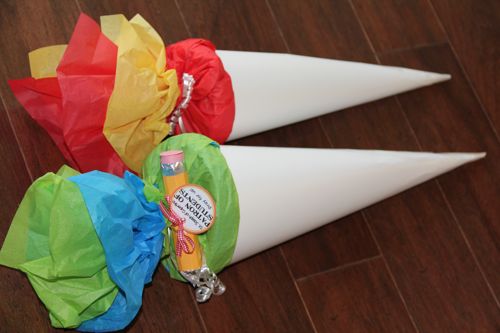
The past couple years I have surprised my kids with Schultütes on their first day of school. Our first day of school is not until September 6th and I usually wait until the night before to make the Schultütes, but since this week is going to be extremely busy, starting with our oldest daughter’s birthday party tomorrow followed by a family vacation, and since my original plans for Saturday were cancelled since Hubby was away on a fire assignment (He was sent out this past Wednesday and surprised us by arriving home early last night!!!), I assembled them on Saturday morning and placed them on the school room table. Now, for some reason, my children can hardly wait to start school! 😉
Usually I use wrapping paper to cover our Schultütes, but this year I just purchased colored poster boards from the Dollar Store (2 for $1) and tied a Patron of Students Back-to-School Treat to the top of each. I also made two mini Schultütes out of one additional piece of white cardstock for our two “pre-schoolers.”
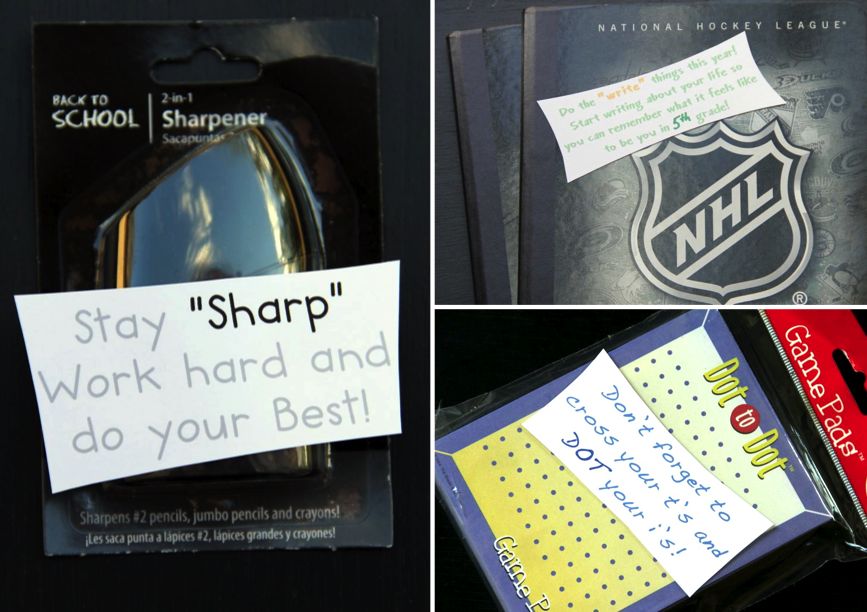
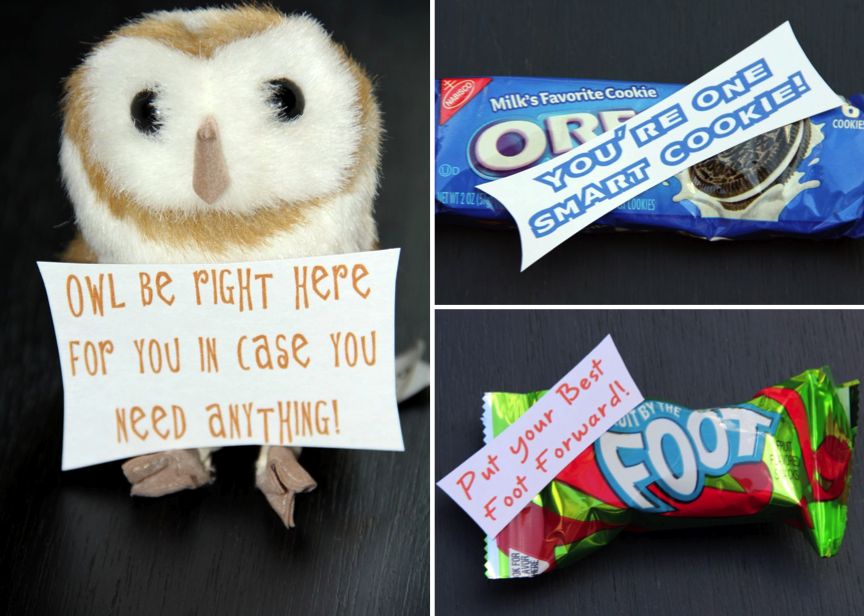
This year I also had fun creating little notes (inspired by a google search) to go along with each of the school supplies and treats Shhhh!!! The contents vary by child, but here’s a sneak peek as some of the things that will be found inside:
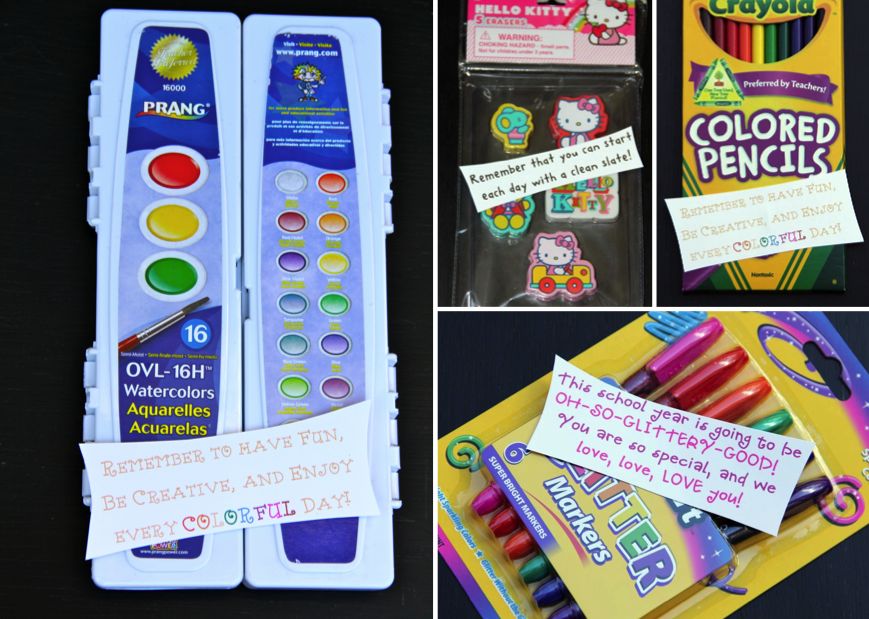
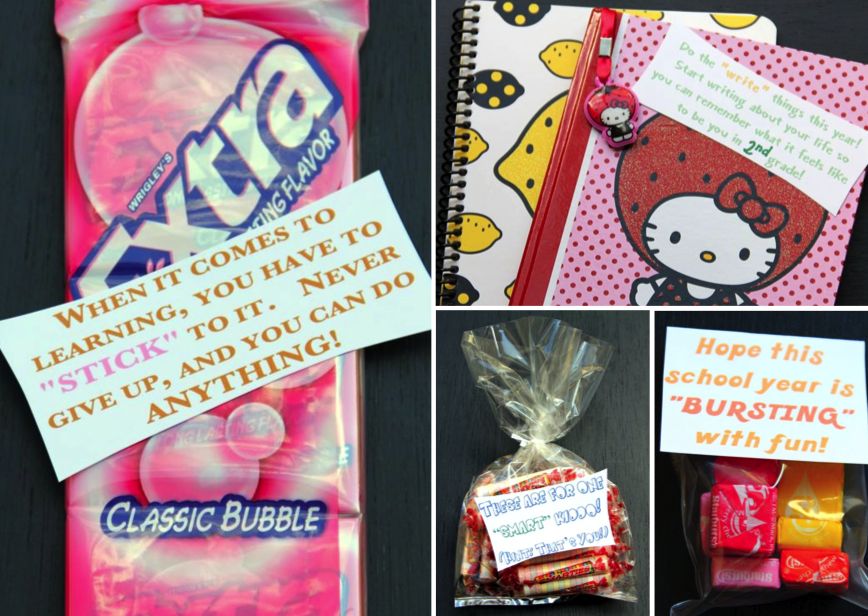
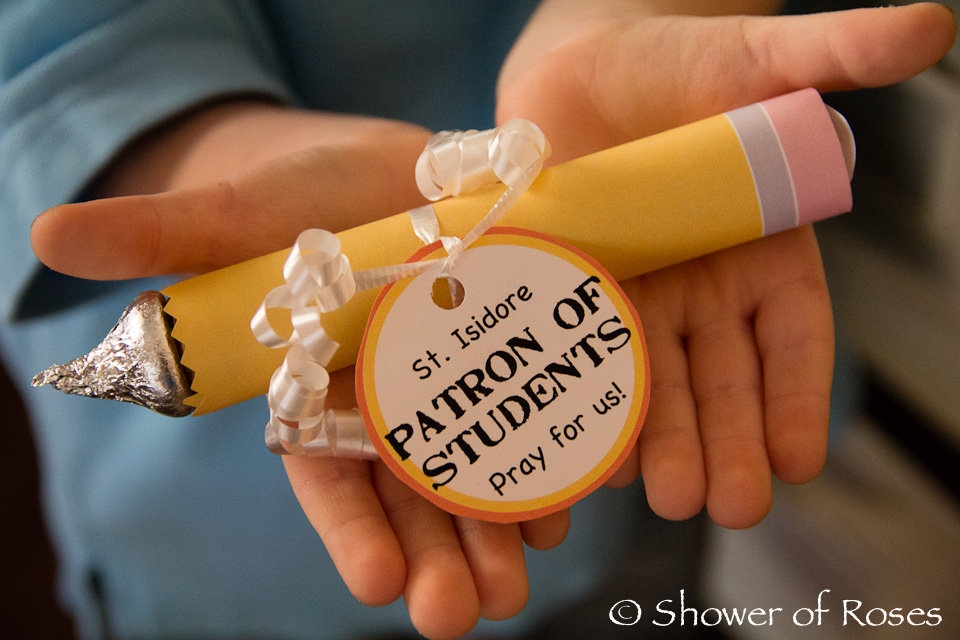
A Patron of Students Back-to-School Treat!

You may have already seen this CUTE idea already, but when I ran across it for the first time last week, I knew I had to adapt them for our children, as an added treat to the Schultütes they receive on their first day of school. The idea was originally from the September 2010 issue of Creating Keepsakes.
These are basically just Rolos covered in two colors of scrapbook paper, some foil, and a Hershey’s kiss on the end.
To make your own:
- 3 1/2 ” x 4 1/2 ” yellow cardstock
- pinking shears
- 3 1/2″ x 1/2″ pink cardstock
- 1″ circles pink cardstock
- 3 1/2″ x 3/8″ aluminum foil
- Rolos and Hershey kisses
- adhesive – I used my Ultra Low Temp Glue Gun

Trim one short end of the yellow cardstock with pinking sheers (zigzag edge scissors), and score every 1/4″ lengthwise. Wrap around the Rolos and adhere. Next, wrap the pink cardstock at the opposite end, adding the pink circle to cover the exposed end of the Rolos. Cover the seam between the yellow and pink paper with the strip of aluminum foil. Add a Hershey Kiss to the top and you’re done! They are super easy to make and turn out adorable.
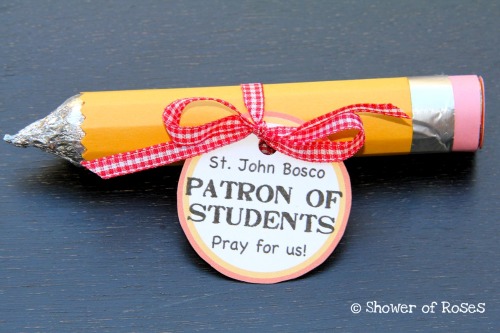
After I was done making the pencils, I decided to add a tags with little invocations to the various Patrons of Students, choosing a different saint for each of my children. I punched a hole in the top of the tag and attached them with some ribbon. You can download my document here.
Note: For those of you that would like to make this, but don’t happen to have any pink or yellow cardstock on hand, here is a quick and easy printable version of the wrapper that I created!
I hope you all have a wonderful and blessed year!
Creator of all things, true source of light and wisdom, origin of all being,
graciously let a ray of your light penetrate the darkness of my understanding.
Take from me the double darkness in which I have been born,
an obscurity of sin and ignorance.
Give me a keen understanding, a retentive memory,
and the ability to grasp things correctly and fundamentally.
Grant me the talent of being exact in my explanations
and the ability to express myself with thoroughness and charm.
Point out the beginning, direct the progress, and help in the completion.
I ask this through Christ our Lord. Amen.
Stocking Up

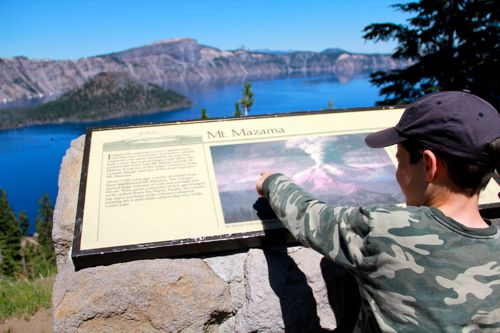
A Visit to Crater Lake


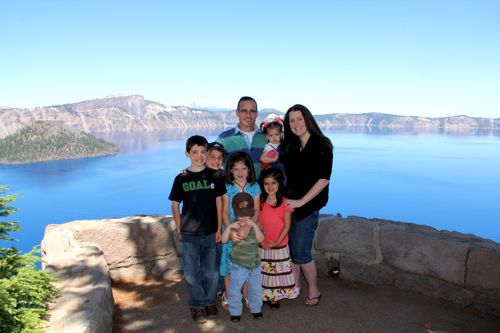

On our way home we picked up pizza for dinner and had just started to eat when our neighbor drove up to alert us to the fire that had just started… It wasn’t exactly the way we would have liked to end our visit, but such a blessing to have him here at the same time! Hopefully it won’t be too long before we are blessed to see him again.


0 Comments